Introducción
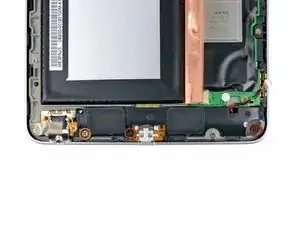
Lack of sound got you down? Use this guide to replace a damaged or broken speaker assembly.
Herramientas


Partes
-
-
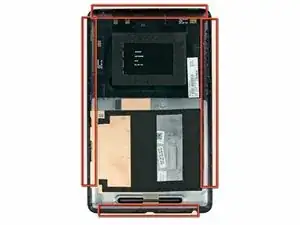
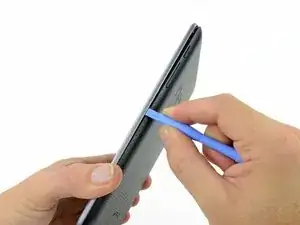
Gently insert a plastic opening tool near the top of the Nexus 7 between the rear panel and the front panel assembly.
-
Carefully run the plastic opening tool along the top edge to pry the rear panel away from the front panel assembly of the Nexus 7.
-
-
-
Insert the plastic opening tool between the rear panel and the front panel assembly near the power button and pry up at several points along the right edge of the Nexus 7.
-
-
-
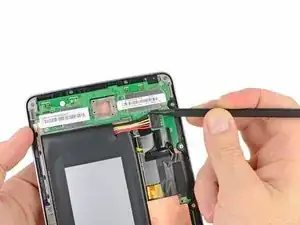
Using the tip of a spudger, push first on one side then the other to "walk" the battery cable straight out of its socket on the motherboard.
-
-
-
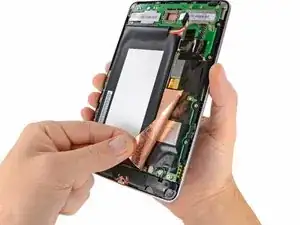
Peel back the copper ESD shielding covering the bottom of the motherboard.
-
If you're just replacing the micro usb charge port, there is no need to peel back the copper heatsink like in the photo, the speaker assembly can simply be moved out of the way once unscrewed. If the speakers are to be replaced simply peel back the bottom corner to expose the speaker connection. Leave the rest of the heatsink shield alone.
-
-
-
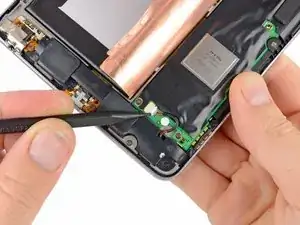
Using the tip of a spudger, push the speaker cable straight out of its socket on the motherboard.
-
-
-
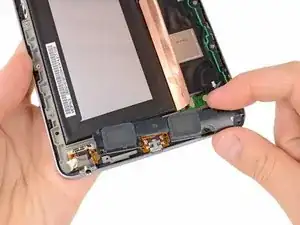
Remove the following screws securing the speaker assembly to the display assembly:
-
Two 4.25 mm black Phillips screws
-
One 3.2 mm silver Phillips screw
-





To reassemble your device, follow these instructions in reverse order.

7 comentarios
Hello. My Nexus 7 had issue with the speaker but I can't return it because i don't live in the USA. Can you tell me where can I buy speaker for the Nexus 7. Thanks.
bobski -
Bobski, if you're not covered under warranty then you'll have to buy the speaker assembly on your own, from eBay or a third party site. They're kind of rare.
EXCELLENT guide, had no issues replacing mine and works great! Thanks iFixit!
Would anyone happen to know the type of connector that is used to connect the nexus 7's speaker to its logic board?
Gray -