Introducción

This guide will show you how to replace your tablet's screen.

  1. QwkPnA3AZKiGZGxp
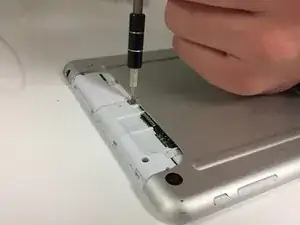
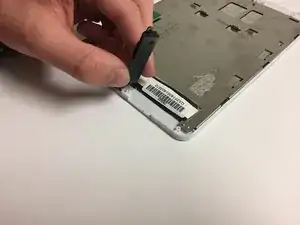
    • On the back of the device there is a white SD card case that shelters the screws that attach the back panel to the tablet.

    • Use your thumbs to slide up and off the small SD card case.

  2. G5fPVJA3koLYE5Ii
    G5fPVJA3koLYE5Ii
    wwM4BRGNpJLNKWwG
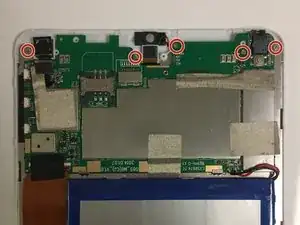
    • Using the Phillips Head #000, unscrew the 5 4mm and 3mm screws at the top.

  3. IAopWVlpFNRVH5f5
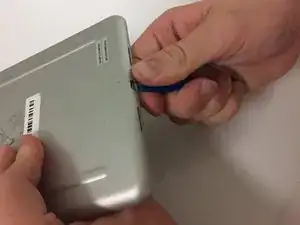
    • Insert a plastic opening tool between the back panel and the front of the tablet, and gently pry it away from the tablet.

    • Do not pry too hard as the screen is fragile and might crack.

    • It is best to start at the bottom of the tablet when prying the back panel off.

    • The volume piece will also dislodge when the back panel is removed.

  4. gIUjAL4U5s3ZL1ol
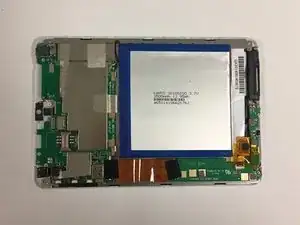
    • The motherboard and battery will have to be removed to expose the metal panel underneath.

  5. BsWGvI6EtHY6yPgV
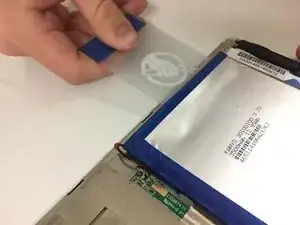
    • Use the plastic card to pry the battery away from the device.

    • The battery is attached to the tablet by glue.

  6. oYKINWiXwY1CI4hp
    • Peel off the battery from the device and set aside.

    • The battery is connected to the motherboard by two wires. Be careful not to sever the connection.

  7. ql5CUSLYLU3tTTFQ
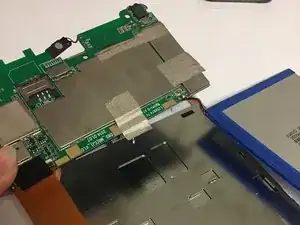
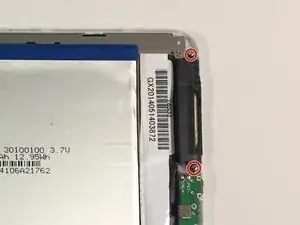
    • Using a #000 screwdriver, unscrew the five 4mm and 3 mm screws connecting the top portion of the motherboard to the device.

  8. LVEpgQIUHZ6VjdQF
    • Disconnect the silver tape that attaches the motherboard to the metal panel.

  9. ACUJWKpmMRUglSlL
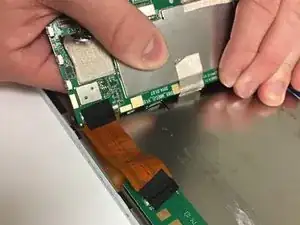
    • Disconnect the ribbon from the bottom portion of the motherboard.

  10. SGH3LJ1tidfeBVxD
    • Remove the motherboard and set aside.

  11. PLoXfyuA4PSZcDZL
    • The smaller portion of the motherboard is located at the bottom with the speaker.

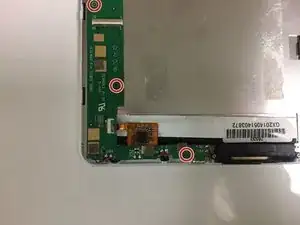
    • Using a #000 screwdriver, unscrew the three 3 mm screws that fasten the smaller segment of the motherboard to the tablet.

  12. 4QkvruchmS6hlkKZ
    4QkvruchmS6hlkKZ
    lpcypPQ3tfO4icB6
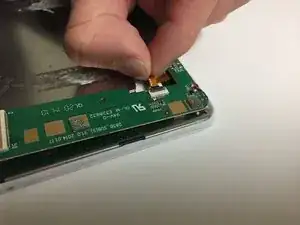
    • Located towards the bottom, carefully remove the yellow film.

  13. YADma2x1iv4HtNqy
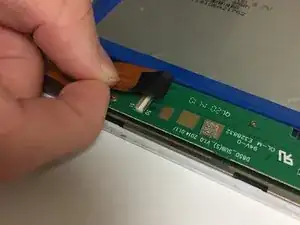
    • Gently disconnect the small ribbon found underneath the film.

  14. FLJNDWoOWDjy5WlC
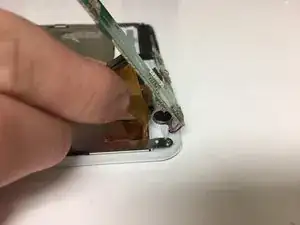
    • There is another connection found underneath this portion of the motherboard.

    • Lifting up the motherboard, disconnect the second ribbon found underneath.

  15. 5xwfMWfSK445cM52
    • Unscrew the two 4 mm #000 screws.

  16. LhEabMl4AP1cGWNN
    • Remove the speaker and bottom portion of the motherboard.

  17. xhMjsXraYxhJJsBi
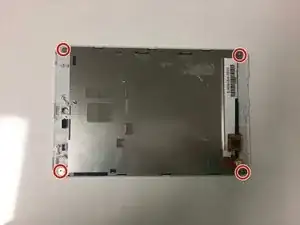
    • At this stage, almost all inside components should be removed (as shown).

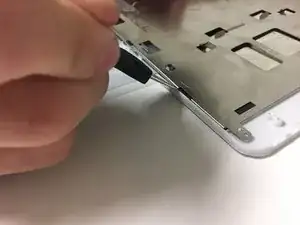
    • Using a screwdriver size #000, remove the four 4 mm screws found at each corner of the metal panel if you haven't gotten them already.

  18. ASFRZnRLWXEdiFJh
    ASFRZnRLWXEdiFJh
    UCjtEaE64LJIY2Mq
    YhjQHDisJGPlqXUJ
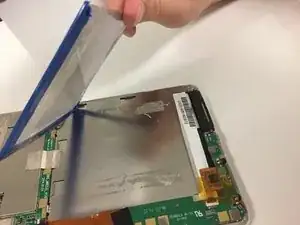
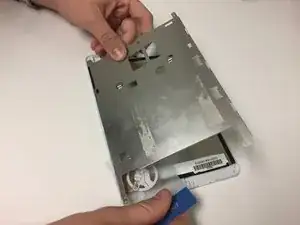
    • Use the plastic card to separate the metal panel from the screen component.

  19. DxCPKBasEEvSvSu2
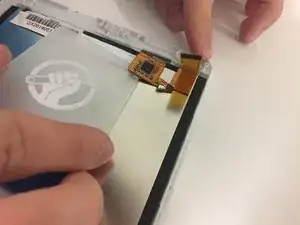
    • Separate memory card from screen.

  20. kQbkTbiKpCENLTeC
    kQbkTbiKpCENLTeC
    rLlG2fdLAbFDqhkp
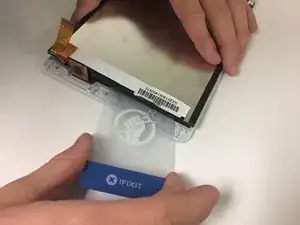
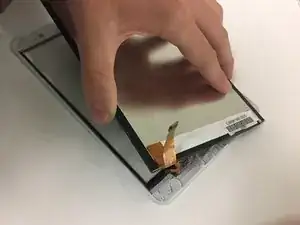
    • Use the plastic card to separate screen component from front panel.

  21. KZJWfAUf1bSN5sKg
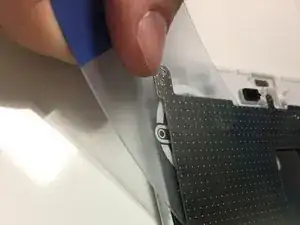
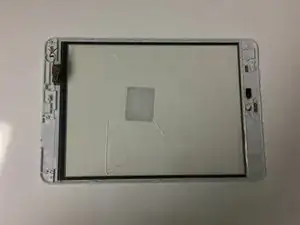
    • Use the plastic card to separate the glass from the front panel.

    • Once the glass is removed, the new glass can be fitted to the front panel.

Conclusión

To reassemble your device, follow these instructions in reverse order.

Michaela Causey

Miembro Desde 20/09/17

328 Reputación

0 comentarios