Dost Mohammad Khan
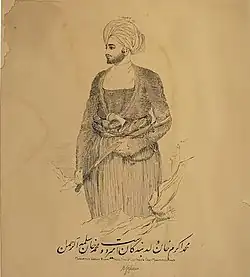
Dost Mohammad Khan Barakzai (Pashto/Persian: دوست محمد خان بارکزی; 23 December 1792 – 9 June 1863), nicknamed the Amir-i Kabir,[3][4][5][6] also known as The Great Amir,[7] also titled Amir al-Mu'minin, was a member of the Barakzai dynasty and one of the prominent rulers of the Emirate of Afghanistan. His 37-year rule was important in the creation of modern Afghanistan, and he ended the 70 year Afghan Civil War from 1793-1863.[8] With the decline of the Durrani dynasty, he became the Emir of Kabul in 1826.[9] He was the 11th son of Payendah Khan, chief of the Barakzai Pashtuns, who was killed in 1799 by Afghan Emperor Zaman Shah Durrani.[2] Dost Mohammad is also remembered as one of Afghanistan's greatest rulers.[10]
| Dost Mohammad Khan دوست محمد خان | |||||
|---|---|---|---|---|---|
| Amir al-Mu'minin Amir-I-Kabir The Great Amir | |||||
 | |||||
| Emir of Afghanistan | |||||
| Reign | 1818 (brief) Summer 1826 – 9 June 1863 (Disputed 1839-1842) | ||||
| Predecessor | Sultan Mohammad Khan | ||||
| Successor | Wazir Akbar Khan Sher Ali Khan | ||||
| Born | 23 December 1792 Kandahar, Durrani Empire | ||||
| Died | 9 June 1863 (aged 70) Herat, Emirate of Afghanistan | ||||
| Burial | |||||
| Issue | 27 sons and 25 daughters at the time of his death[2] | ||||
| |||||
| Dynasty | Barakzai dynasty | ||||
| Father | Sardar Payinda Khan Muhammadzai (Sarfraz Khan) | ||||
| Religion | Sunni Islam | ||||
Dost Mohammad began his official reign at the beginning of his rule in 1826 when he usurped Kabul. However, he had taken Kabul a few years prior in 1818, as well as later returning to power in 1842 after the First Anglo-Afghan War, where his rule was disputed from 1839 to 1842 by Shah Shuja Durrani.
When Dost Mohammad ascended to the rule of Kabul, the Afghan realm faced a period of decline. Beset by civil war between the sons of Timur Shah Durrani, the formerly large Durrani Empire had split into multiple mutually-hostile principalities. By the end of his reign, he had reunited all the former split principalities (including Kandahar and Herat) with Kabul. Dost Mohammad also secured his country's independence from foreign powers in the First Anglo-Afghan War, defeating the British and their attempts to try and restore the former Durrani ruler to the throne, Shah Shuja Durrani.
Dost had ruled for a lengthy 37 years though having been involved in the politics of Afghanistan for much longer. His rule saw the consolidation of Afghanistan, which was long divided following the Durrani civil wars which started in 1793. The name Afghanistan would be popularized in his later reign, and his Kingdom would be known as Afghanistan, rather than Kabul.[11] He would eventually triumph and lead his last campaign to unite Afghanistan by capturing Herat, finally conquering it on May 27, 1863. Dost Mohammad died shortly after this on 9 June 1863 at the age of 70, having accomplished the reunification of Afghanistan.
Dost Mohammad is credited for laying the foundations of the first modern Afghan state.[12] He is also remembered as one of Afghanistan's greatest rulers.[10]
Early Life and rise to Power (1792-1826)
Dost Mohammad Khan was born to an influential family on 23 December 1792 in Kandahar, Durrani Empire.[13] His father, Payinda Khan, was chief of the Pashtun Barakzai tribe and a civil servant in the Durrani dynasty. Their family can be traced back to Abdal (the first and founder of the Abdali tribe), through Hajji Jamal Khan, Yousef, Yaru, Mohammad, Omar Khan, Khisar Khan, Ismail, Nek, Daru, Saifal, and Barak. Abdal had Four sons, Popal, Barak, Achak, and Alako.[14] Dost Mohmmad Khan's mother belonged to the Qizilbash group,[15][16][17][18] and from the Persian tribe of Sīāh Manṣūr.[15] Dost Mohammad Khan spoke Persian, Pashto, Punjabi and Turkish, but also had knowledge of the Kashmiri language.[19]
Dost Mohammad Khan was only seven years old when his father, Payinda Khan, was executed.[20] Due to this and the realms instability, Dost Mohammad Khan was unable to receive any proper education, unlike his brothers.[20] After Fateh Khan and Mahmud Shah Durrani conquered Kandahar in 1800, he became the attendant of his older brother, Fateh Khan Barakzai.[20] Dost Mohammad grew even more prominent in Mahmud's second reign, taking up military positions, and even important political office positions, such as the deputyship of Kabul, and the governorship of the Kohistan region.[20]
His elder brother, the chief of the Barakzai, Fateh Khan, took an important part in raising Mahmud Shah Durrani to the sovereignty of Afghanistan in 1800 and in restoring him to the throne in 1809. Dost Mohammad accompanied his elder brother and then Prime Minister of Kabul Wazir Fateh Khan to the Battle of Attock against the invading Sikhs. Mahmud Shah repaid Fateh Khan's services by having him executed in 1818, thus incurring the enmity of his tribe. The Barakzai brothers would lead a campaign against Mahmud, including Dost Mohammad, who briefly occupied Kabul in 1818, and established his brother as temporary governor.
After a bloody conflict, Mahmud Shah was deprived of all his possessions but Herat, the rest of his dominions being divided among Fateh Khan's brothers. Of these, Dost Mohammad received Ghazni, to which in 1826, Dost Mohammad toppled his brother, Sultan Mohammad Khan in a coup for Kabul, Dost Mohammad did this by capitalizing on Sultan Mohammad Khan's unpopularity, mostly due to his alienation of the Qizilbash factions in his country, leading to attacks on Shia Muslims.[21]
Dost Mohammad Khan decided to use this by visiting a prominent tribal leader, Hajji Khan Kakar,[21] promising him to become the Hakim of Bamyan in exchange for his aid to support a coup.[21] With this support, Dost Mohammad sent Sultan Mohammad an ultimatum, demanding for him to relinquish his control over Kabul, or it would be taken by force.[21] Sultan Mohammad failed to realize the threat at hand, and disregarded the ultimanum.[21] Dost Mohammad then resorted to force, surrounding the citadel of the Bala Hissar, and shelled the upper citadel.[21] Sultan Mohammad finally surrendered his position to Dost Mohammad, capitulating the rule of Kabul over to him.[21] This coup added was very successful for Dost Mohammad, as Kabul was the richest of the Afghan provinces at the time.[22] At the time of his unofficial enthronement in 1826, his government revenue was about 500,000 rupees, and by the 1830s it had increased to 2.5 million rupees.[23]
First Reign (1826-1842)
Having consolidated his rule in Kabul in 1826 after assuming power there, Dost Mohammad made no claim to the Kingship of Afghanistan, This was because he wished to distance himself from the Sadozai ruling Durrani dynasty of Afghanistan prior, even adopting the title of Amir, rather than Shah, as the Durrani Emperors had used.[24] Dost Mohammad's coronation in Kabul was also similar to that of Ahmad Shah Durrani's in 1747.[24] Dost Mohammad was named Padishah, with the title Amir al-Muminin, meaning commander of the faithful.[25] To also not show himself as a usurper, Dost Mohammad pointed out that his grandfather, Hajji Jamal Khan, was the strongest of candidates among the Pashtuns before intervention by Sabir Khan (who had encouraged people to vote for Ahmad Shah), during the Loya Jirga for Ahmad Shah Durrani.[25] Thus, portraying the Muhammadzai claim to power, instead of showing himself as a usurper to the Afghan throne.[25] Another reason why Dost Mohammad advocated for the title of Amir al-Muminin, was due to the fact that he needed the support of the Ulema in Kabul, Ahmad Shah Durrani did not choose a title of religious legitimacy during his ascension, instead, adopting the title, Durr-I-Dauran, meaning Pearl of the Age.[25]
After his coronation, Dost Mohammad focused on establishing a regular army. By 1832, Dost Mohammad fielded an army of over 9,000 Cavalrymen, and 2,000 Infantrymen, considered to be the strongest in Afghanistan during the time. [26] This proved effective in growing his dread, as his other Barakzai brothers did not challenge his power in Kabul over the fear of his growing large army.[26] During the early years of his first reign, his influence was generally left to Kabul and Ghazni.[26] It is described by Christine Noelle that in the 1820s, the Kabul realm under the Barakzais authority ended just twenty miles south of Kabul,[26] While the base of the Hindu Kush formed the northern boundary of his realm until 1826, when a rebellious brother of his, named Habibullah, controlled Parwan with a force of Uzbeks and Hazaras.[26]
Although Dost Mohammad controlled Bamiyan, the routes leading were controlled by independent Hazara chiefdoms.[26] In the east of his realm, the extent of his rule ended at Jagdalak pass, while Jalalabad and Laghman remained under the control of Muhammad Zaman Khan and Abd-Al-Jabbar Khan.[26] The revenues of Balabagh were collected by Usman Khan, the city was governed by Dost Mohammad's brother, Amir Muhammad Khan.[26] Despite Ghazni being a part of Dost Mohammad's sphere of influence, Amir Muhammad exercised direct control over the city, and it is unknown if he submitted revenue payments to Dost Mohammad.[26] All these combined made the early Muhammadzai Kingdom surely possibly doomed to fail, having been isolated directly by most of the other powers of Afghanistan, and drawn into conflict with others occasionally, alongside nominal discontent including amongst his brothers who were seeking to fight for rule over Kabul, the early Muhammadzai Kingdom appeared as if it would not fare well.[26]
Kabul under early Muhammadzai Rule (1823-1834)
Kabul was the capital of the Durrani Empire, however, after the Durrani Dynasty was banished to Herat, Kabul relatively remained as a prosperous trade city amongst all the political unrest that had developed in the region.[26] In the early nineteenth century, Kabul consisted of three geographic and administrative centers, the Bala Hissar, the city of Kabul, and Chindawul. In the 1820s, the Muhammadzai Sardars inhabited the Bala Hissar, also referred to as "The Citadel".[27] It was made clear that there was an upper and lower citadel, as the lower citadel was also erected between 1775 and 1779, with the upper citadel reserved for state prisoners.[27] However under early Muhammadzai rule, as a result of political unrest, the upper citadel was left in ruins.[27] According to Christine Noelle, the city of Kabul was estimated to consist of around 5,000 houses, and 2,000 shops.[27] Mohan Lal's description of the Chaharsu Bazar in 1832 states,
"The shops displayed a profusion of those fruits which I used to esteem costly luxuries. The parts of the bazar which are arched over exceed anything the imagination can picture. The shops rise over each other, in steps glittering in tinsel splendour, till, from the effect of elevation, the whole fades into a confused and twinkling mass, like stars shining through clouds."[27]
The total population of Kabul was estimated to be around 9,000 families, or 50,000 to 60,000 residents inside the city.[27]
Muhammadzai Consolidation of Power (1834-1837)
.jpg.webp)
Dost Mohammad and his campaigns for consolidation of power and further authority in Afghanistan took many years to accomplish, beginning to appoint local sardars to rule provinces for him to grow his popularity amongst territories he had ambitions to conquer.[28] Dost Mohammad would challenge his authority with his nephews who ruled over Jalalabad and Ghazni, continuing to expand his authority.[28] One such opportunity came in early 1834, when Shah Shuja, the former Durrani ruler of Afghanistan, began approaching Kandahar, as the Dil brothers appeased to Dost Mohammad for assistance against Shah Shuja.[28] Rather than mobilizing his forces toward Kandahar, Dost Mohammad led his forces east ward to Siyahsang.[28] His sons Mohammad Akram Khan and Muhammad Akbar Khan were sent to Jalalabad, where they "scattered" the army of Muhammad Zaman Khan, according to the depictions of Noelle.[28] Nonetheless, Dost justified this attack by claiming it under the pretext of raising an army to combat Shah Shuja.[28]
Following this, Dost lead his forces to Jagdalak, which was ruled by Muhammad Usman Khan under Zaman Khan. Immediately as Dost Mohammad fielded his armies outside the city, Usman Khan surrendered the city to Dost, under the condition that the city would be spared from a military attack.[28] With Dost Mohammad having now attempted to seize Jalalabad, Zaman Khan entered negotiations with the Peshawar Sardars to support him in case of another attack from Dost in Kabul.[28] However, Sultan Mohammad Khan was unable to provide any aid to Zaman, as Peshawar was under threat from Sikh Armies.[28]
Only supported by local chiefs, Zaman Khan found himself unable to field a proper army to contest Dost Mohammad as he marched on Jalalabad. Dost Mohammad seized the city, however offering generous and honorable peace terms.[29] One of these terms were that Dost Mohammad would compensate Zaman Khan with over 150,000 rupees per year.[29] Having now secured Jalalabad, Dost Mohammad appointed Muhammad Akram Khan and Amir Muhammad Khan as governors of the city.[29] The Province of Jalalabad under Dost's rule extended as far as Dakka in Mohmand territory from the Jagdalak pass.[29] The province of Jalalabad alone and the villages of Lagman fielded over 400,000 rupees of revenue, and following Dost Mohammad's conquest, it raised to around 465,000 rupees.[29]
Followed by this conquest, many new regions became subject to Dost Mohammad, including the valley of Kunar, where the governor was appointed by Dost Mohammad Khan in exchange for tribute.[29] Dost Mohammad then marched on Kandahar in 1834, having exploited the situation at hand to gain more influence over Kandahar.[30] Shah Shuja set out in the summer of 1834 to Kandahar, however this expedition was a failure, as Shah Shuja's siege ended in 54 days.[31] With Shah Shuja's army being defeated in early July to the joint coalition between Dost Mohammad Khan and the rulers of Kandahar. Shah Shuja's withdrawal also saw him leaving behind all his luggage.[30][29] When Dost Mohammad's officials searched Shah Shuja's luggage, they found several letters from the British, addressed toward Shah Shuja as they had proclaimed full support for his cause.[30] The British, and specifically Wade, an advisor, claimed they were forgeries and blamed Karamat 'Ali, the Kabul news writer, who he accused of "deceitful conduct" and "gross subterfuges" according to the depictions of Christine Noelle.[30] This harmed early Anglo-Afghan relations, as Wade did not keep his intentions on wanting Shah Shuja to return to the throne private.[30]
Shortly after Dost Mohammad's victory over Shah Shuja, his older brother, Amir Muhammad Khan died in July 1834, leaving his son, Shams al-Din to succeed him as governor of Ghazni.[29] This included the districts of Nani, Oba, Qarabagh, and Muqur.[29] Ghazni was a strategic province, having generated over 200,000 rupees under the Durranis. Amir Muhammad Khan was able to expand his authority to the provinces of Wardak and Logar, adding over 120,000 rupees to his income, proving himself as a capable administrator.[29] His revenues in total while ruling Ghazni totaled to around 404,000 rupees.[29]
After the death of Amir Muhammad Khan, Ghazni was essentially independent. However, in 1837, Dost Mohammad began leading his efforts to secure complete authority over Ghazni.[29] Dost Mohammad Khan then deposed Shams al-Din, unceremoniously removing him from power and appointing his son, Ghulam Haidar as governor.[29] With Ghazni now secured, Dost announced that he felt secure, and believed his government was now able to progress better.[29] During his early government, Dost Mohammad's rule of Kabul and Kohistan only brought around 500,000 rupees of revenue. However, by the late 1830s, his revenue grew to between 2.4 million - 2.6 million rupees.[32] While though conquering new territories was one of the reasons to this surge, it came primarily from more efficient taxation.[32]
Tensions with the British and Simla Declaration (1838)
In 1838, tensions between the Afghans and Sikhs grew even more, specifically after the Afghans attempted to take Jamrud, Dost Mohammad's relations with the Sikhs deteriorated, as with the British.[33] On 1 October 1838, Lord Auckland, Governor General of India issued the Simla declaration, pointing out of Dost Mohammad's pro Persian sentiments, as well Barakzai hostility toward the Sikhs.[33][34] As the British took favor with one of the deposed Durrani Kings, Shah Shuja Durrani, who had failed outside of Kandahar in 1834.[35][33] Accordingly, with this, the British and Shah Shuja fielded their armies. According to the depiction of Christine Noelle, the "Army of the Indus" lead by Shah Shuja consisted of around 15,000 men, including 6,000 hired men.[33]
Dost Mohammad's first invasion of Balkh (1838-1839)
Dost Mohammad Khan did not entirely understand British implications in their declaration, as Dost Mohammad was unsure the British would even go to war, and believed that even if they did, it would take until spring 1839 to properly field their armies for such an invasion.[36] Dost Mohammad decided to begin expanding his authority beyond the Hindu Kush, and sent an army by his designated heir, Akram Khan to force the principalities of Khulm and Qataghan to accept his authority.[36] This invasion was to hope that he could have higher revenues, as well controlling all the custom points between the Amu Darya and Kabul.[36] The subjugation of these territories to the north also provided safe haven if an invasion of southern Afghanistan was to happen.[36][37]
With Akram Khan's approach, Saighan and Kahmard submitted to the Barakzais, as well as Khulm, who had swore loyalty to Dost Mohammad.[37] Akram Khan decided to attack Balkh, which was held by Bukhara following the collapse of the Durranis.[37] However a battle did not occur, as the governors, Ishan Sudur and Ishan Uraq to accept Afghan Suzerainty.[37] Murad Beg of Qataghan then also submitted to Barakzai rule, this brought Dost Mohammad's borders stretching as far as Aqcha, to the borders of Badakshan in the east.[37]
However, in early March 1839, hearing of a British invasion being imminent, recalled Akram Khan to march back to Kabul, this march ended in disaster.[37] Food, fodder, and fuel were in low supply, troops crossed the Shibar pass and its freezing cold, losing many soldiers.[37] When the survivors of this march arrived at the Darband river, it had a raging torrent, nonetheless, Akram Khan's army still marched through, many more drowning from its icy flowing waters.[37] Akram Khan's remanant forces finally arrived in Kabul in April, however it was no longer a fighting force, as thousands of men had died, and the survivors facing snow blindness, frostbite, and hunger, according to the depictions of Jonathan lee.[37] As well as this, Akram Khan was forced to abandon his artillery, these combined losses severely affected Dost Mohammad's preparations to try and repel the coming British invasion.[37]
First Anglo-Afghan War (1839-1842)
The British Expedition (1839)

By the time Akram Khan had returned to Kabul, the British force had reached Baluchistan and was preparing to march in Kandahar, ruled by the Dil brothers under the Emirate of Qandahar. [37] This force was commanded by General Willoughby Cotton, with the force consisting of around 9,500 troops of the Bengal and Bombay army, and mostly 7,000 Indian levies recruited by Shah Shuja. [38] The British campaign force was encumbered by an entourage of 30,000 camp followers and a vast baggage train, followed by a divided General staff. This got to the point where Wade wished to resign due to his minimal role given in the war, as he had around 800 men and was stationed in Peshawar. [38] Despite General Fane's attempts to dissuade the attempts of keeping such a large camp following, officers embraced that if they were going to war, they would “do it in style” according to the depictions given by Jonathan lee. [39] The British force traveled through Sindh, while also “pursuading” the Amir of Khairpur to become a British protectorate, furthering their access in the region. [39] The troops finally reached Dadar after a long route taken in Kalat. Dadar was the entrance to the Bolan pass. By the time the British force passed through the Bolan pass and arrived at Quetta, it was no longer an efficient fighting force due to the scorching heat and hard terrain. [40]

The British forces also suffered supply issues, with local rulers unable or unwilling to send supplies to the British expedition, the troops were put on half rations, while the camp followers were forced to fend for themselves. [41] There was however good news for the British expedition, as Burnes had convinced Mehrab Khan, the ruler of Kalat to provide safe passage and supplies for the British expedition for a “substantial fee”, as described by Jonathan lee. [41] Macnaghten, however, did not trust Mehrab Khan, and while Burnes was negotiating a deal between them and Mehrab Khan, Burnes wrote to Auckland, accusing him of being an “Implacable enemy” [41] and urged the Governor to allow the annexation of towns they would take along the army's supply route. [41] Auckland refused this request, however Macnaghten was able to get his way, as in November 1839, he accused Mehrab Khan of duplicity and cutting the army's supply line, insisting he had broke their agreement. [41] The Bombay division, on its way back to India, was sent to attack Kalat, sacking the city, as Mehrab Khan and many of the cities principal leaders were slain. [41] The regions captured were put under Shah Shuja's realm. [41]
The expedition's next challenge was the Khojak pass, another formidable barrier even more worse than the Bolan pass. [41] The British Expedition fought their way up the narrow defile, where local Ghilzai and Baluch tribesmen had blocked with stones as barriers. [41] On the Kandahar side of the pass, Kohan Dil Khan and a force of 1,500 tribal levies were preparing to attack as the British expedition entered the plains. [41] Fortunately for the British, the army did not have to fight their way to Kandahar, as Hajji Khan Kakar, a man who Dost Mohammad Khan expelled from Kabul and who had joined forces with the Kandahar sardars opened contact with Shah Shuja, offering to defect to his cause for the post of Mukhtar al-Daula, one of the most powerful positions in his kingdom. [42] Shah Shuja agreed to these terms and Hajji Khan Kakar defected to his side with those loyal to him. [42] Upon this, Kohan Dil Khan and the other Dil brothers fled to Girishk. [42]
Shah Shuja and the British conquer Kandahar, and March for Ghazni (25 April-23 July 1839)

On 25 April 1839, Shah Shuja entered Kandahar unopposed, with Macnaghten writing to Auckland that the king was “received with feelings nearly amounting to adulation” according to Jonathan Lee's depiction. [42] Though other officers had reported a lack of public enthusiasm following Shah Shuja's return. [42] On 8 May, the British and Sepoy troops staged a grand review and crowned Shah Shuja after a 21-gun salute. A column was sent to search for and capture the Dil brothers, but they had escaped and rejected all attempts to negotiate with them. [42] Instead, the Dil brothers began to gather and raise an army to resist the occupation. [42] The exhausted British troops took 2 months to recuperate following their expedition to Kandahar, it was not until after the end of June 1839, that Keane ordered his troops to march on Kabul. [42]
It was around this time that Ranjit Singh of the Sikh Empire had died, kicking off a dynastic struggle that eventually tore the Sikh Kingdom apart. [42] Keane left behind his heavy siege guns oddly and set out, harassed all along the route by Irregular cavalrymen from Gul Muhammad, or Guru Hotak, and Sultan Muhammad Khan Tokhi. [42] All of whom refused the customary for passage for payment, nonetheless, if they had accepted, the British expedition would be forced to search through everything they had, as their treasury was empty. [42] Dost Mohammad was taken by surprise from the southern army's march, as he believed they would march on Herat, and a second army would attack from Peshawar. [42] Dost Mohammad also believed Keane would bypass Ghazni, since the Afghans found the fort impenetrable, as a result, no reinforcements were sent to the city. Nor did Dost Mohammad's son, Haidar Khan, who was governor of Ghazni, strengthen its defenses. [43] Instead, Dost Mohammad sent Afzal Khan, another one of his sons, to join the Ghilzai raiders, hoping to draw the British away from their base in Kandahar and attack them at Sayyadabad, between Ghazni and Maidan Shah.[43] Keane, however, did not have the intention of leaving an enemy fort unoccupied behind his lines, as a result, he took the Tokhi stronghold of Qalat-i Ghilzai by storm and installed a garrison there. [43]
On 21 July 1839, the army arrived at Ghazni, with an assault led by Afzal Khan and the Ghilzais being driven off. [43] This assault by Afzal Khan saw over 64 prisoners being taken, with them being handed over to Shah Shuja, where he tried them as rebels. [43] The Ghilzai retorted that since the king was a “Kafir” and a “friend and slave of infidels”, they had every right to resist him and to fight on. [43] One Ghilzai prisoner drew a knife and Shah Shuja was nearly mortally wounded, before being saved by a bodyguard, who had threw himself between the King and his assailant, taking the blow instead [43] Shah Shuja responded by condemning all prisoners to death, and his executioner proceeded to saw their heads off with a blunt sword. [43] Unfortunately for the king, a British officer stumbled upon the executions, and a few weeks later, this spread to the Bengal newspaper, full of the gory details of events that had occurred. [43]
Capture of Ghazni and March to Kabul (23 July-6 August 1839)


With Keane's arrival to Ghazni, he did not expect it to be so well fortified, making him regret leaving his heavy siege weaponry behind in Kandahar.[44] However, the British were aided by Sardar ’Abd al-Rashid, a grandson of Pur Dil Khan.[44] al-Rashid provided key information about the defences of the city of Ghazni, where he identified the Kabul gate as the weakest and best available point for British forces to strike.[44] Keane ordered an attack on the Kabul gate in the dark of night, with a diversion using bombardment and a feint by Infantry on the other side of the wall.[44] Sapping parties laid down charges and blew down the gate, where they stormed the fort, successfully capturing it with around 200 British killed and wounded, compared to around 500 Afghans killed.[44] When Afzal Khan heard of the fall of Ghazni, he returned to Kabul, abandoning his baggage and camp animals.[44]
While the southern force from Kandahar led its expedition, Wade led different tactics to undermine Dost Mohammad's position from Peshawar, building a covert spy network into Dost Mohammad's administration and family.[45] One such was Ghulam Khan, a confidential news writer who was paid by Wade 40,000 rupees to raise and incite rebellions in the regions of Kohistan and Logar.[45] However, Dost Mohammad's spies caught onto the plan, this led to the arrest of Ghulam Khan. Ghulam Khan, however, escaped hidden under a Burqa, fleeing to Tagab.[45] The populations of Tagab, and the Koh Daman however, were reluctant to rebel, with earlier memories of the destruction brought by Dost Mohammad in other campaigns under the Durranis.[45] The situation however, changed, with many prominent Sardars begun to defect to Shah Shuja's side, this allowed the prominent sardars there to raise an army, also offered 8,000 rupees as a starting incentive by Ghulam Khan.[46] in Mid July, Ghulam Khan set out for Kabul at the head his raised army.[46]
As with this, Dost Mohammad's situation continued to grow worse and worse, with Keane and the rebellion from Kohistan now marching on Kabul, and Ghazni having fallen, Dost Mohammad had no choice but to open peace talks, attempting to salvage his position to remain as Wazir to Shah Shuja.[46] This offer was however, rejected, where his complete abdication and exile was demanded.[46] In Kabul, Dost Mohammad pleaded with the Qizilbash present there to make a last stand at Sayyidabad so they would die with honour, they however, refused to leave Kabul.[46] On 2 August 1839, Dost Mohammad discharged them from their oath of allegiance and set out for Bamiyan, accompanied by Akram Khan, Nawab Jabbar Khan, and other family members.[46] When the British heard of Dost Mohammad leaving Kabul, they attempted to send a force to pursue him, however they made a mistake by sending Hajji Khan Kakar, as he delayed the pursuing force, and by the time the British pursuing force arrived at Bamiyan, Dost Mohammad reached Saighan safely, this forced the British to abandon the pursuit.[46]
British Occupation of Kabul (6–7 August 1839)
Following Keane's arrival to the outskirts of Kabul 4 days after Dost Mohammad fled, he found that the Kohistan rebellion that was raised had occupied the city, a situation that allowed the rebel leaders to negotiate better and more favorable terms with Shah Shuja.[47] Shah Shuja entered Kabul the following day, mounted on a ceremonial elephant, and wearing robes sparkling in jewels.[47]
Shah Shuja’s Administration and relationship with the British (1839-1840)

With Shah Shuja returned to the throne, he proceeded to undermine the British position present in Kabul by alienating prominent Sardars and powerful tribes.[48] Shah Shuja made multiple errors by failing to reward and satisfy tose who had helped bring him to power, including Hajji Khan Kakar, which he exiled to India following British accusation that he allowed Dost Mohammad to escape.[49] It was not long after this that conflict rose between Shah Shuja and the British political establishment, with Shah Shuja trying to affirm that the British had no right to intervene in his internal affairs.[49] Despite this, Burnes and Macnaghten did their best to advise the Shah on different policies, securing appointment for pro-British officials, and forcing the Shah to revoke his judicial decisions.[49] Later Burnes continued to drew up plans for reform on revenue, acting on his own civil authority.
It did not take long for other Afghans to notice this conflict and divide, as petitioners who were rejected by the King turned to the British, who in turn forced Shah Shuja to revoke said decision or implement them.[49] Even Afghans who had little wished for a Sadozai to return to the Afghan throne noticed that the monarchy had been essentially stripped of all power, and that non-Muslims were essentially de facto ruling Shah Shuja's kingdom.[49] The presence of British forces and Camp followers nearly doubled the population of Kabul, with an extra 30,000 souls causing an economic crisis.[49][50] The British also paid much higher wages compared to the market rate, causing a large shortage of labourers.[50] Even when Shah Shuja regarded this to Macnaghten, the influx of labourers came from the countryside of Shah Shuja's kingdom, leaving many fields and those who worked agriculturally, their fields, unfinished or uncollected.[50] This included winter wheat, as now winter was approaching, the army present in Kabul bought up large amounts of grain, fodder, and fuel at heavily inflated prices.[50] Prices continued to rise when landowners and shopkeepers prevented supplies from coming in, in hopes to sell them for higher prices.[50]
The situation became even worse, as they expected standards of up to the British inflation caused in due term of payment, refusing to sell their produce to the local people unless they paid as such.[50] Soon the price rose beyond affordable, and the streets of Kabul became full of beggars.[50] Burnes tried to stop this by giving out naan but failed to realize that his purchases were contributing to the crisis rather than stopping it.[50][51] Mullah Shakar, the Wazir to Shah Shuja, issued an order fixing the price of wheat to an affordable price so local people could afford such.[51] Those who wanted to make a larger profit responded by closing their shops and refused to bake, as a result, Mullah Shakar sent officials into the Bazaars, forcing bakers to bake food, otherwise they would be fined, or even imprisoned.[51] The bakers complained to the British about the issue, and as a result, the British took to the bakers side, forcing Shah Shuja to lift what his Wazir had implemented to try and fix the crisis. The bakers were thus free to charge whatever price they wished, with unpopularity growing even more between Shah Shuja's regime, the British, and the local populace.[51]
Dost Mohammad Khan’s resistance and opposition to Shah Shuja and British Occupation (1839-1842)
With Shah Shuja's regime continuing to grow in unpopularity, resistance already began formulating in Autumn 1839, with raids from Ghilzais attacking the Kabul-Ghazni road led to the death of British Lieutenant Colonel Herring.[51] Beyond the Hindu Kush, diplomats of Dost Mohammad were sent to the rulers of Balkh and Bukhara to appeal to them for aid against the British.[51] These risks forced the British to continue to keep troops they were planning to send back to India. Dost Mohammad's request for aid, however, did not come lightly received, as Dost Mohammad had invaded the realm of Balkh just before the British invasion.[51] As from this invasion, Dost Mohammad had annexed Saighan, Balkh, Kahmard, and Duab.[51]
In the winter of 1839, against the advice of Jabbar Khan, Dost Mohammad traveled to Bukhara to be received in person to appeal to the ruler of Bukhara in person.[51] Dost Mohammad along with his sons, Akram Khan and Afzal Khan were initially well received, respected as guests. However, it came clear that the ruler of Bukhara was not willing to support Dost Mohammad.[52] Instead, Dost Mohammad was essentially put under house arrest, and later treated as a prisoner. Suspicions even rose that the ruler of Bukhara would try to have Dost Mohammad and his sons poisoned.[52] It was not until the following summer did Dost Mohammad escape, and through a series of events, made his way to Khulm.[52] However, following this, he found out that Jabbar Khan had accepted Mcnaghten's offer of amnesty and took back the women and children of Dost Mohammad's camp.[52] Despite his family being in British hands, Dost Mohammad did not show any intent to surrender.[52]
The Mir Wali raised a force of over 6,000 Uzbeks, and in September 1840, marched up to Surkhab, forcing the British to abandon their outposts of Ajar, Kahmard, and Bajgah, falling back on Bamiyan.[52] During the encounter at Bajgah, half of Shah Shuja's cavalry while the entire force's officers defected to the resistance's side, while the remaining Afghan levies were captured and disarmed.[52] Dost Mohammad followed up this success by marching on Bamiyan, however he encountered Colonel Dennie, who had an army of Gurkhas and native cavalrymen.[52] Despite being outnumbered, Dennie ordered his Gurkhas to storm the enemy positions, successfully routing the Uzbek army.[52] Dennie then pursued the retreating army with his cavalrymen, slaying those who had defected and the rest of the Uzbek army.[52]
Following this victory, Dr Lord, the political officer in Bamiyan, offered Dost Mohammad honourable exile in India if he surrendered.[52] Only to be informed that Dost Mohammad was “determined to conquer or fall in the attempt”.[52] The Mir Wali and Murad Beg had sought co-operation, as they believed Dennie posed a threat and could possibly march all the way to Khulm.[52] Dennie, however, was not in a position to do so due to the already overstretched Bamiyan garrison facing shortage of manpower, and as a result, they decided not to garrison Saighan, Kahmard, or Ajar.[52] Threats of a British sponsored attack from Herat by Shah Kamran were a threat, and this forced the Wali of Maimana to pledge allegiance to Shah Shuja's rule.[53]
The Reality of Shah Shuja’s situation and his powerbase (September 1840)

The desertion of Shah Shuja's men was a blow to British morale, as they lost hope that he could sufficiently raise his own Afghan national army to defend himself, especially since they wished to withdraw many regiments back to India.[53] As a result, the British sent an additional 2,000 troops to help grip Shah Shuja's reign over his unstable populace, and the already overstretched garrisons, especially in cities like Bamiyan.[53] Despite this, Auckland wished to withdraw British troops from Afghanistan, and to leave only one or two regiments.[53] The British now faced the reality that Shah Shuja was not as popular as he was believed to be, especially now that he was having trouble to raise a large army to defend his rule, let alone sufficiently pay for it, as the British had to subsidize the Shah's regiments.[54] Even Mcnaghten had to face this startling reality, as Shah Shuja's power was confined to his courtiers, as not even the Qizilbash, who were the backbone of Sadozai military power after Timur Shah could be trusted due to many of their senior commanders being related by marriage to Payindah Khan and Dost Mohammad.[54]
Revolt and Sale’s campaigns in the Koh Daman and Kohistan (September-2 November 1840)

The Defeat at Saighan and Mir Wali's treaty with Shah Shuja made Dost Mohammad abandon his attempts of trying to raise an army in Balkh, and instead found allies elsewhere, where he allied with the leaders of the Kohistan rebellion that had tried to depose him prior, from Sultan Muhammad Khan of Nijrab and Mir Hajji.[54] After a year of British occupation, they realized their mistake of opposition toward Dost Mohammad, and now called for his restoration, seeking to support him.[54] Mostly disappointed by the lack of reward Shah Shuja gave them, as well as poor rule from Shah Shuja's regime led to this.[54] Shah Shuja even lowered their allowances and demanded several years of payment of revenue.[54] Adding to the tension that was already there, Shah Shuja also forcefully conscripted hundreds of Kohistanis and Safis into his army.[54]
Mir Hajji and other religious leaders refused to also pay a tax imposed by Shah Shuja, claiming it was against shari’a and unlawful for the ruler to impose such.[54] When they came to Kabul to discuss the issue with Shah Shuja, he refused to allow them to leave, and shortly after the victory at Saighan, they were imprisoned.[55] The Shah imprisoned Hafizji and other religious leaders.[55] Following the arrests, Mir Hajji and Hafizji denounced Shah Shuja as a “Kafir”, and legitimized a Jihad against him and the British.[55] By the end of September 1840, the regions of Kohistan, Tagab, and Nijrab were in revolt, posing a serious threat to Shah Shuja's regime, as these areas could mobilize up to 50,000 men.[55]
With only two British-Indian regiments left in Kabul to defend the city, as well as the Shah's army deemed unfit, Dennie was recalled from Bamiyan.[55] As a result, Shah Shuja's kingdom's most northern outpost was now Old Charikar in the Koh Daman.[55] News of the uprising in Kohistan struck fear in the capital, with shopkeepers closing their shops, burying their jewels and other treasure, and sending family to scatter across the countryside.[55] Realizing that action had to be taken, General Cotton called upon Robert Sale, a veteran of the Anglo-Burmese war.[55]
Robert Sale was tasked with ending the rebellion, and while planning, he was accompanied by one of Shah Shuja's sons, Timur Mirza.[55] Sale began his first campaign and immediately faced harsh resistance, where in his first battle at Tutam Darra, Lieutenant Edward Connolly, Arthur Connolly's brother, was shot through the heart, however the fort was retaken from rebels.[55] Sale's next objective was the stronghold of Jalgah, governed by Mir Masjidi.[55] When Sale's men attempted to storm the walls of Jalgah, they were repelled with heavy casualties.[55] This was as a result of Sale's scaling ladders brought from Kabul being too short to properly scale the walls of the stronghold.[55] Even worse for him, Sale did not bring any heavy siege weaponry, however, fortunately for Sale, Mir Masjidi was wounded among the fighting upon his first attempt at storming, as a result, he abandoned the stronghold.[55] The following morning, Sale marched into the stronghold, ordering it and its crops, orchards, and vineyards to be razed and burned.[55] Yet Sale's storming of the stronghold was rather unneeded, as prior to the assault, Ghulam Khan had secured Mir Masjidi's allegiance, alongside Mir Hajji and Khoja Abd’al-Khaliq.[56] This was due to the fact that they did not owe allegiance to Dost Mohammad, in-fact, they were indebted to the Sadozai dynasty who had helped bring them to rule in the region under Zaman Shah Durrani.[56] And now, having heard of Sale's attack on Jalgah, Mir Masjidi accused Ghulam Khan and the British of perfidy, fully defecting to Dost Mohammad's side alongside a group of pirs.[56]
In early October 1840, Dost Mohammad arrived in Nijrab to command his army.[56] Sale, seeking to force an open battle with Dost Mohammad, moved across the Panjshir, razing many local villages and their crops, orchards, and vineyards.[56] At the same time, Sale overstretched his line of communication, and supply lines.[56] When Sale reached the village of Kah Darra, the rebels abandoned it after brief fighting, to which, many local village leaders and elders came to Sale to show their allegiance.[56] Despite this, Sale ordered the burning of Kah Darra's 800 houses, razing the entire village alongside its crops, vineyards, and orchards.[56] This action of brutality that was meant to inspire dread and fear however, backfired, as Saif-al-din's nephew, who was the leader of a Kohistani regiment under Shah Shuja was brought the news, he defected with a large amount of men, including nearly all the Durrani Cavalry.[56]
On 2 November 1840, Dost Mohammad finally confronted Sale's forces, halting his advance and engaging battle at Parwan Darra.[56] Dost Mohammad held a strong defensive position, with his forces dug in on a ridge overlooking Sale's advance.[56] Sale sent Captain Fraser and his Bengal horse force to attack the enemy infantry, however, only a handful of men followed the order, leaving the British officers to charge against the Afghan force alone and essentially without any support.[56] Dr Lord, earlier political officer of Bamiyan who offered Dost Mohammad terms of surrender was killed amongst this fighting that broke out.[57] Fortunately, Fraser survived this charge and returned to British lines, however, with his sabre nearly severed at the wrist.[57]
Dost Mohammad, seeing what had happened ordered his cavalry to lead a counter-attack, whereupon the disorganized Bengal horse force was routed, with the Afghan Cavalry chasing them in pursuit and killing many.[57] According to the depictions of Jonathan Lee, the 2nd Bengal Horse was disgraced for their inability to follow orders, later disbanded, and erased from records.[57] Nonetheless, following this route, Sale ordered his infantry and Qizilbash to storm the heights, and after heavy fighting and heavy casualties, they secured the ridge, to their dismay where they saw Dost Mohammad withdraw his forces in good order.[57] Both sides withdrew, and later, the Afghans re-occupied the ridge, which was left undefended.[57] With the ridge position, they fired onto the British camp below. As the following day came, Timur Mirza and Burnes urged Sale to abandon the campaign.[57] This was due to the Afghan troops loyal to Shah Shuja who had not deserted, already being on the edge of mutiny, as well as Sale losing hundreds of men and many more wounded with nothing to show for it.[57] With supplies running low as well, he obliged and returned to Charikar, crossing the Panjshir river, with those villages he had campaigned for at great cost quickly being reoccupied.[57]
The “Surrender” of Dost Mohammad Khan (2 November 1840)

Despite Sale having little to show for the campaign and the trail of devastation left by him, Sale called Parwan Darra a victory.[57] However he was unable to conceal the fact of the 2nd Bengal horse defying orders, and as a result, many British officers were killed.[57] Atkinson, the armies surgeon general, called the encounter a “disaster”, Kaye also called the battle a defeat.[57] However, early in the evening of 2 November 1840, a horsemen identified as Sultan Muhammad Khan Safi rode up to Macnaghten, as with this, he was followed by another lone horsemen, who came up to Macnaghten.[57] This horsemen was no other then Dost Mohammad Khan.[57]
Dost Mohammad's surrender has been given much speculation by historians as to why he surrendered.[58] A number of explanations range from Dost Mohammad's surrender, oddly even after his victory at Parwan Darra.[58] According to Jonathan Lee, some of these depictions include Dost Mohammad believing that the British were destined to rule between the Indus and more.[58] Others claim according to Jonathan Lee, that, after the defeat at Saighan, Dost Mohammad was free to surrender without loss of honour.[58] Another theory being that Dost Mohammad surrendered due to the brave suicidal charge done by Captain Fraser and Dr Lord, where he could have recognized resistance as futile.[58] This theory however, did not make any sense as where the 2nd Bengal horse faced many defy orders to charge with them, the British lost multiple men due to this and inevitably, the battle.[58]
Another theory to Dost Mohammad's surrender was his family being in custody with the British, and about to be exiled to British India.[58] This theory is even less credible, however, due to the fact that the British promising to treat them honourably, as Dost was in no position regardless to change this.[58] Nonetheless, whatever reason Dost Mohammad had surrendered for, it was clear he was not surrendering as a defeated man, as he had successfully defeated the British at Parwan Darra, and even forced their withdrawal from Bamiyan.[58] The revolt in Kohistan also put the military favor within Dost Mohammad's reach, yet for some reason, he decided to give up resistance.[58]
Mohan Lal gives the most clear and coherent theory was to why Dost Mohammad surrendered, as according to Lal, Dost Mohammad Khan was plotted against, and in battle, a sniper planned to assassinate him.[58] As further explained by Lal, this was plotted out by Kohistani Amirs, who would then blame the British for this.[58] Lal's accounts and claims are supported by letters to Dost Mohammad Khan from Sultan Muhammad Khan of Nijrab, who had warned the Amir of a plot that was circulating from Maliks who were planning to betray and assassinate him.[58] Abd al-Karim Alawi, who wrote a near contemporary account of the First Anglo-Afghan War, elaborates further on the details of this plot.[58][59]
According to Al-Karim, Sales and Burnes were in contact with the Malik of ‘Ali Hissar, who agreed to kill or capture Dost Mohammad and his two sons in exchange for a substantial payment.[59] According to confidential information shared by British officers, Macnaghten and Burnes had been intercepting communications from Sultan Muhammad Khan of Nijrab, and his supporters.[59] As a result, Macnaghten forged a letter from a well-wisher in Kabul, sending a letter to Dost Mohammad Khan, where it warned the Amir of a plot on his life.[59] Dost Mohammad Khan, having read this letter, was convinced that there was indeed, a plot on his life, as he did not have reason to trust the Kohistanis, as decades prior, he attacked and razed the region.[59] As a result, the only person he seemed to have trusted was Sultan Muhammad Khan of Nijrab.[59] As a result, Dost Mohammad’s options were limited, as the Mir Wali and Murad Beg signed a treaty with Shah Shuja, no longer offering sanctuary for Dost Mohammad.[59]
His experience in Bukhara and how he had to escape swayed Dost Mohammad from trying to seek refuge in Balkh, as he could be imprisoned, or even killed.[59] Therefore, he went to the only choice he could think of, the British.[59] The British cantonment at Kabul was only a few hours ride from Parwan Darra, and he had already received assurances that he would be treated honourably in captivity and exile.[59] As a result, Dost Mohammad’s “surrender” is treated by Jonathan Lee and many other historians as nothing akin to surrender, rather seeking refuge with the British government through an old tradition of grabbing the stirrup.[59] An old Turco-Mongolian tradition called rikab giriftan.[59] Atkinson states that Dost Mohammad was seeking the protection of the British government through this action, and as a result, a famous sketch was produced showing Macnaghten and Dost Mohammad shaking hands as a sign of friendship.[60]
According to Jonathan Lee, Akbar Khan had later stated that his father “Thrown himself upon the honour of the British government, in times of need”.[60] Macnaghten was elated to hear the news, as according to Jonathan Lee, he stated: “The Afghans are gunpowder and the Dost is a lighted match”.[60] Dost Mohammad was treated honourably, and even was housed in the Bala Hissar, with Dost Mohammad allowed to meet his family, and write to his sons that were in open resistance.[60] Dost Mohammad was also allowed to ride on horse with an escort.[60] During his stay in the Bala Hissar, he held a secret court, with many coming to pay their respects to the former Amir.[60] This had shown Dost Mohammad's popularity, and opposite to Shah Shuja's claims, Shah Shuja was seen as unpopular by many.[60] In Macnaghten's letters, it was shown that he expressed sympathy for Dost Mohammad, showing a very clear contrast to what he referred to him now compared to two years prior, where he denounced Dost Mohammad in the Simla declaration.[60] Macnaghten even asked the Governor General to treat Dost Mohammad better than when they had Shah Shuja in his exile, since to his statement: “We ejected the Dost, who never offended us, in support of our policy, of which he was the victim”.[60]
Following the surrender of Dost Mohammad and his exile to India, the resistance that rose in Kohistan slowly died out, with resistance fighters returning waiting dormantly.[60] However, Sale's scorched earth policy of burning villages, cropyards, vineyards, orchards, and more were unsettling the populace.[60] As described by Jonathan Lee, “awaiting a spark to ignite the flames”.[60] Akbar Khan, Dost Mohammad's son, took refuge with Muhammad Shah Khan, his father-in-law, and head of the Babakr Khel Ghilzais of Laghman.[60] While two more of Dost Mohammad's sons, Azam Khan and Sher Ali were in Zurmast.[60] Despite the threat posed by these Sardars and more, Macnaghten allowed Jabbar Khan and Muhammad Zaman Khan to remain in Kabul, where they attempted to undermine Shah Shuja's authority in secret intrigue with the Ghilzais.[60]
Rise of tensions between Shah Shuja and the British (1840-1841)

Following the victory in Kohistan, Macnaghten and Burnes exploited this to accuse Mullah Shakar, Shah Shuja's Wazir, of intentionally inciting the revolt.[61] As a result, they pushed for Shah Shuja to replace Mullah Shakar with Mohammad Osman Khan, son of Wafadar Khan, and the man who was responsible for killing Dost Mohammad's father, Payindah Khan Barakzai.[61] Shah Shuja had multiple reasons to not trust Osman Khan, as he was a Kamran Khel Sadozai, and hence, a rival for his throne, to which he could press the claim any time he wished.[61] This appointment of Osman Khan was a de facto coup, as he was an excellent source of inside information, where after every court session, he would return with information to Macnaghten and await tasks to do for the day.[61]
Macnaghten's and Burnes's affirmation of Osman Khan as Wazir further reinforced the idea that Shah Shuja was just king in name, as Shah Shuja also publicly complained about his little power.[61] Shah Shuja went as far as to reinforce this claim by sending petitioners to Burnes and Macnaghten instead of dealing with their issues himself.[61] Burnes continued going into area's of where the King should have complete power over, including plans for reform of the military and state finances and taxation.[61] More often following this, Burnes did not consult Shah Shuja or his ministers about such, as a result, continuing to reinforce the divide and increasing tensions. A similar case occurred in Kandahar, when British political officials attempted to reform Administration, and opened plans for a major overhaul in land tax.[61]
General Nott, a local garrison commander in the region even flogged some of Timur Mirza's men, and when Auckland reprimanded him, tensions grew further within British command.[61] A position that was expected to go to Nott was commander-in-chief, yet following this event and Nott going into a fit of rage, it was instead given to William Elphinstone, Auckland also appointed Brigadier General John Shelton as Elphinstone's second in command. Auckland believed these were the best candidates for the positions.[62] When Elphinstone and Shelton arrived in Kabul, Macnaghten told them no worry of anything militarily, claiming that Kabul was secure, and many surrounding territories were all clear.[62] According to Jonathan Lee, When junior officers had tried to warn Macnaghten of trouble brewing, he dismissed them as “croakers”.[62]
The unstable British occupation and its consequences (March–September 1841)
The British occupation of Afghanistan was drawing on much longer than expected, raising concerns in Calcutta and London for how the war was progressing. In the Indus campaign, over 26,000 troops were tied up, with another 16,000 troops present in Afghanistan, and a further 9,000 men stationed in Sindh and Baluchistan to protect the British supply lines.[63] As following Ranjit Singh's death, troops were deployed into Punjab, and even more were tied down against the Qing in the First Opium War.[63] The deployment of these forces outside the frontiers of India raised concerns that there were insufficient forces in the Indian heartland to deal with rebellion if it became an issue.[63] Auckland also grew more concerned with the British occupation and the implication of establishing Shah Shuja on the throne, as the occupation had already costed around 1 million British pounds.[63] This was followed by another half a million pounds being used to upkeep the garrisons in Sindh.[63]
The cost of the war was growing more and more, and even put the British Indian government over 1 million pounds in debt, forcing them to borrow heavily to bear the expenses of the war.[63] This grew more and more unsustainable, and in Spring 1841, Auckland informed London of his plan to all but two regiments to leave in Afghanistan, with one in Kabul, and the other in Kandahar.[63] Thus as a result, he wished to withdraw within 1 year.[63][64] Shah Shuja was hence, given the task of filling in the states finances that the British had been up-keeping for them, and to raise an army of over 12,000 men to fill in the British withdrawal.[64] Given the desertion at Parwan Darra and Saighan, this was a difficult task. Shah Shuja even informed Wade that Ahmad Shah's kingdom did not provide sufficient revenue to cover state finances, nor paying and equipping a large standing army.[64]
When Shah Shuja returned to the throne, he tried to change this by taxing the populace, as well as confiscating auqaf holdings, and tax-exempt estates, only for this to provoke revolts against him and continue the spread of his unpopularity.[64] In order to pacify the rebels, the tax was abandoned, and the British found themselves in a difficult position, where withdrawal was the preferred option, however if they left, it could lead to the fall of Shah Shuja's government, and the emergence of an anti-British government.[64] At the same time, the British could not continue subsidizing Shah Shuja's government and continue fighting his wars.[64]
In order to save money, Auckland ordered Macnaghten to reduce expenses drastically, from 1 million British pounds to 30,000 pounds by the end of 1842.[64] Burnes and his advisors then began drawing up plans in Kandahar for a major reform of the army and state revenue. Much to the disapproval of Shah Shuja, to which he saw this as the British continuing to interfere in his internal affairs.[64] When Shah Shuja tried to impose taxes once again on religious endowments, there was fierce resistance, with prominent tribal chiefs including Aminullah (also known as Amin Allah) Khan Logari, and Hamza Khan of Tezin, to which Shah Shuja responded by dismissing them from their posts.[64]
In Kandahar, the Durranis of Zamindawar and Helmand rebelled under the leadership of Akhtar Khan, with the Afghan regiments sent by Nott to suppress the rebellion being defeated.[64] Nott then sent British and Indian to suppress the rebellion, to which this succeeded and Akhtar Khan was defeatd.[64] However, Akhtar Khan regrouped a few months later and besieged Giriskh with its British garrison.[64] According to Jonathan Lee, a major rebellion was incited in 1841 due to rumors of additional revenues and reports that Nott planned to garrison Qalat-I-Ghilzai, to exterminate the Ghilzai “nation”.[64] As a result, many Hotakis and Tokhis fled to the defence of Qalat-I-Ghilzai, and when Nott arrived with his forces to put down this large rebellion, he found himself facing thousands of hostile tribesmen.[64] As Nott began advancing upon the citadel, the Ghilzai forces attacked, whereupon Nott responded with disciplined musket fire and grapeshot, inflicting heavy casualties on the Ghilzais.[65] Despite heavy casualties, the Ghilzais continued their attacks on the British lines, attacking and harassing them until five hours later, the Ghilzais fled from the growing losses.[65]
Nott's victories in the Helmand and Qalat-I-Ghilzai further reinforced Macnaghten's belief that Afghanistan was pacified, and the war was slowly drawing to a close.[65] As a result, he began underestimating the true lengths of revolts that rose. Macnaghten wrote in August 1841, “Those who knew this country when it was ruled by the Barakzais, are amazed at the metamorphosis it has undergone, and with so little bloodshed”.[65] And when Henry Rawlinson, the political officer in Kandahar, warned Macnaghten that the rebellions were the beginning of a more serious trouble, Macnaghten ignored this, stating:
“unwarrantably gloomy view of our position, and entertaining and disseminating rumours favourable to that view. We have enough of difficulties and croakers without adding to the number needlessly. These idle statements may cause much mischief, and, often repeated they are, they neutralise my protestations to the contrary. I know them to be utterly false as regards this part of the country, and I have no reason to believe them to be true regarding your portion of the Kingdom”.[65]
As a result of this reinforced belief, Elphinstone and Macnaghten continued ignoring the warnings of experienced Indian officers, and Afghan well-wishers.[65] More Indian troops were withdrawn, and by the end of October 1841, there was just one British and Indian regiment in Kabul, supported by a corps of Shah Shuja's troops.[65] In order to raise the 12,000 men the British expected to fill in the holes of the British withdrawal, Burnes drew up complete reform of the Kingdom's military.[65] Modelled off the British army, a completely new officer corps was raised based on merit rather than birth status.[65] A force of around 1,600 men were raised, known as the Janbaz, was commanded and trained by British officers, but paid at the King's expense.[66] The Janbaz were paid regular wages, and received reward for bravery, and even land grants.[66]
A second corp, the Hazarbashis was also established as a personal kings guard, tasked with protecting the King and defending the capital.[66] Though it was not brought up nor mentioned, the Hazarbashis replaced the Ghulam Khana, which did not go unnoticed by the Qizilbash.[66] The officer corps was also reduced, with serving military officers having to apply again to the Janbaz or the Hazarbashi, essentially in effect sacking the entire Afghan military command.[66] These humiliating actions did not top what was imposed by the British, as nobles now had to go to Lieutenant Trevor, one of the lowest in British command, to where they felt insulted as they had commanded their own tribal militias, and now they were being reduced to petition.[66] Trevor even told the nobles that in a year or two their “kind” would be unemployed, and rewards after that point would be a pure act of charity.[66]
The biggest insult that enraged the nobles however, was the fact that the Janbaz and Hazarbashi forces had to swear a new oath of allegiance to Shah Shuja, unless they be exiled. The reason they found this insulting was due to the fact that they had already pledged allegiance when Shah Shuja and the British took Kabul.[66] As a result, the nobles took this as Shah Shuja doubting their loyalties.[66] The angry nobles demanded for Shah Shuja to remove the order, to which Shah Shuja called them cowards who uttered idle threats.[67] He notified them that, since he was king in name only, the nobles should go to Macnaghten for their issues.[67]
As a result, on 1 September 1841, all but a handful of officers refused to take the oath of allegiance, to which, Shah Shuja responded by banning them from court and demanded they took the oath or face punishment.[67] After around nearly a month of standoff, most of the officers took the oath, and in secret, some military officers planned to take revenge on Macnaghten and Burnes who had reduced them to this level of what they saw as humiliation.[67] Macnaghten then proceeded to alienate the tribes which had brought Shah Shuja to power.[67]
In the Autumn of 1841, Macnaghten received Auckland's orders to reduce their spending, and find savings of hundreds of thousands of pounds within a matter of weeks.[67] Convinced that much of Afghanistan was pacified following Nott's victories at the Helmand and Qalat-I-Ghilzai, he halved the payments of the chiefs of Tezin, Jabbar Khel, and the Kohistani pirs.[67] In September 1841, Macnaghten summoned the chiefs who had their payments halved, justifying it by Sultan Muhammad Khan's methods of paying the Jabbar Khel only around 13,000 rupees.[67] This cut in their payments raised many concerns, as the payments helped the chiefs maintain their positions by isolating and getting rid of their rivals, the loss of revenue thus, posed a serious threat to their standing within their tribe.[67]
Jihad against British Occupation (September–November 1841)
A few days after Macnaghten broke the news of the tribal chiefs payments being halved, key tribal chiefs and other prominent leaders who were affected by Macnaghten's reforms, including, Durrani nobles, Ghilzai Khans, and Kohistani Mullah's all met in secret in Kabul and swore on the Quran to unite and “Annihilate” the invaders.[68]
One of the first signs of trouble following this secret declaration was when the Tezin Ghilzais plundered a qafila on its way to Kabul.[68] A few days later, the Jabbar Khel attacked, and within a week, British supply lines and communication to Peshawar were completely cut.[68] This was followed by an incited revolt in Laghman, where Muhammad Shah Khan, the father-in-law of Akbar Khan, secured a fatwah from local Mullahs and declared Jihad against the British and Shah Shuja's regime.[68] As a result, Shah Shuja dispatched Hamza Khan, head of the Tezin Ghilzais, to negotiate with Muhammad Shah.[68] When Hamza Khan opened negotiations with Muhammad Shah, he further asked them to continue their revolts.[68] When Hamza Khan returned to Shah Shuja, he was imprisoned for treachery, angering his tribe.[68]
As Sale's brigade was about to return to India, Elphinstone ordered him to reopen the Kabul-Jalalabad road, however, since the troops were at the end of their tour of duty, Elphinstone refused to issue them the latest percussion rifles, instead giving them the most oldest and worn-out Brown bess muzzle-loading muskets.[68] The Brown bess was a relic of the Napoleonic wars, and junior officers even referred to them as “useless” and “about as bad specimens of firearms as can be manufactured”.[68] The Brown bess was only effective at short range and less accurate then the Afghan Jezail.[68]
Sale's brigade had to fight all the way from Khak to Tezin and often storm heights multiple times to drive off enemy snipers who were harassing them as they marched.[68] When Sale's brigade reached Tezin, the local chiefs subsidy was restored in full, and given an unofficial apology due to the halving of their revenue.[68] At Gandamak, Sale received message from Elphinstone to march to Kabul, as Kohistan had risen in revolt.[68] Sale's brigade, however, was in no shape to push to Kabul, having lost most of their officers and with hundreds dead or wounded.[68] Sale's situation was not presented much better as they were running low on ammunition, and most of the baggage they had was abandoned or looted.[68] After consulting with his senior officers, Sale decided to ignore the orders from Elphinstone, and instead marched to Jalalabad, taking its key fort and strengthening it's defences.[68] And while Sale battled his way to Jalalabad, Macnaghten was celebrating and congratulating himself on the defeat of the Ghilzai revolt, as with this, he believed he and Elphinstone, who was now facing troubles with Gout would be returning to India shortly.[69] As a result, at the beginning of November, Eldred Pottinger, who was the political officer in Charikar, wrote to Macnaghten that Mir Masjidi Khan and Sultan Muhammad Khan of Nijrab had revolted, he did not take the threat seriously, and remarked that once the tribesmen had heard of the Ghilzai defeat at Qalat-I-Ghilzai, they would surrender.[69] Macnaghten did not realize the threat of the situation, and that the Kohistan uprising was as a result of the meetings in Kabul six weeks prior to revolt against the British.[69] This “revolt” however, soon changed, as Mir Masjidi had declared Jihad.[69]
On 1 November, Mir Masjidi's forces overran Aq Sarai, also cutting off its only line of retreat to Kabul. Mir Masjidi then set out for Kabul with five hundred men, while 2,000 more were sent to support Muhammad Safi, who was marching on Laghmani.[69] These rapid attacks by Mir Masjidi led to Old Charikar and Laghmani to be encircled by over 20,000 men total.[69] As a result, on 3 November, Pottinger agreed to meet with the rebels, with his assistant Rattray. Unbeknownst to him however, it was a trap, where Rattray was shot in the back and killed, however, Pottinger returned to Laghmani unharmed.[70] With no relief coming, Pottinger abandoned Laghmani and withdrew to old Charikar, however, not long after, Charikar was also besieged, with its water supply diverted.[70] When Codrington attempted a sortie to secure water, he was shot dead and Pottinger was wounded in the foot.[70] Despite lack of water, the British garrison held out for a week, repelling all attempts to seize the fort.[70] On 9 November, a "friendly sayyid" was allowed into the fort to inform Pottinger of an uprising in Kabul, as well as the death of Burnes.[70] With most of the force not in a proper condition to fight, Pottinger was forced to make the decision to attempt a retreat to Kabul. However, unknown to him, Macnaghten came to agreement with Mir Masjidi to let the garrison go in exchange for 60,000 rupees.[70][71] Pottinger split his army into two columns, managing to slip away without detection only for the two columns to lose communication with each other in the dark.[71] Pottinger and Haughton, on horse back made it to Kabul, however the rest of the force was picked apart by Afghan Cavalry, slaughtering the abandoned force.[71]
Kabul uprising and death of Burnes (1-2 November 1841)

When Pottinger and Haughton arrived at the Kabul cantonment, they found Kabul in an uproar, as an uprising had begun in November 1841.[71] The uprising was due to the combined events of allowing non-Muslims to dictate over Shah Shuja, where British interference in the Afghan foreign affairs and Burnes's reforms which had undermined the power of the king and his courtiers.[71] These combined reasons led to resentment directed toward the British. The revolt was coordinated by an oath on the Quran six weeks earlier.[71] With the chief instigator of the uprising being 'Abd Allah Khan Achakzai, priorly being a Durrani noble and supporter of the Sadozai Monarchy. Sometime before the secret meeting in September, he met with Allah Khan Logari, where he was persuaded to become the titular head of the revolt, placed as commander in chief of the insurrection.[71][72][73] 'Abd Allah Khan continued to grow influence in Kabul, securing the support of key Popalzai Royalists, several members of Kabul's religious establishments, and the head of the Bayat Qizilbash.[72] Aminullah Khan Logari and many other leaders of the uprising however, were imprisoned by Shah Shuja, dismissed from their posts, or their privileges' removed.[72] The conspirators goal was to restore power to Shah Shuja rather than having it be in the hands of the British, however were divided amongst whether Shah Shuja should remain king, or if one of his sons should take his place.[72] The conspirators also believed that if the British withdrew from Afghanistan, they would be able to raise an army to maintain the Sadozai Monarchy.[72] In order to gain the support of the Muhammadzai, the Royalists planned to restore an agreement made by Ahmad Shah and Hajji Jamal Khan to have to have one of Payindah Khan Barakzai's sons to be appointed as Wazir.[72] The Royalists however, had multiple issues with their planned revolt, as the Royalists were unable to accept the fact that Shah Shuja was not a popular king, as well as the fact that Shah Shuja was reliant on British aid to keep his rule, as the British were paying stuff from army wages to civil service, as well as fighting their battles.[72] Alongside this, cooperation with the Muhammadzais was an unrealistic prospect due to the tensions and already bad blood between the two lineages.[72] 'Abd Allah Khan also had a vendetta against burnes, following tensions about a large debt he owed to a Hindu moneylender, Burnes demanded he repay the debt, to which Allah Khan refused.[72] Alongside this, one of Allah Khan's concubines had escaped from his harem and took refuge with Burnes in his house.[72] Another similar case occurred to Allah Khan's brother, where on this occasion a woman was pledged in marriage to his brother, however, she also had fled and took refuge with British officers.[72] Allah Khan was concerned as this had hurt their honor, and as a result he made it his objective to attack the houses of Burnes and Trevor first.[72] It was also public knowledge that Trevor had thousands of company rupees stored in his house, as well as both houses were guarded with a small amount of sepoys, was further reason to attack the houses as the treasure would be useful to raise further troops.[74]
News of the plot spread and the evening before the plot, Mohan Lal's spies informed him of the plot, and he sent a warning to Burnes to increase the amount of guards on his house.[74] Afghan sympathizers also warned Burnes that an attack was imminent and that he should take refuge in the Bala Hissar until Shah Shuja could arrest the conspirators.[74] Burnes however, ignored these warnings and refused to leave, however, he did further order to increase the guard upon his house. These, however, never arrived, leaving only a few sepoys to defend Burnes and Trevor's house.[74] On the evening of 1 November 1841, Mir Masjidi Khan rode into Kabul and announced that Kohistan had rebelled.[74] Fearing that the Royalists had lost the initiative, 'Abd Allah Khan decided to act. Early the following morning, a band of his retainers attacked Burnes's house and set it on fire.[74] Burnes, his younger brother, and other occupants were killed in the raging fire as they attempted to escape, Trevor's compound was also sacked, with the sepoy guards killed and the treasury looted. Trevor, his wife, and his seven children escaped to Chindawal where they were sheltered by Khan Shirin Khan Jawanshir.[74] Nawab Muhammad Zaman Khan gave refuge to Mohan Lal and warned 'Abd Allah Khan that if he attempted to capture Mohan Lal, he and the Barakzai clan would declare war on him.[74][75] Despite the heavy fighting and chaos in the city, it was not until the following day that Macnaghten and Elphinstone were convinced that Burnes had been killed and that there had been an uprising.[75] This lack of action helped the rebels, as the Hazarbashis mutinied and attacked or killed any British officer they saw.[75] Shah Shuja decided to take action, sending a corps of Ghulams commanded by John Campbell, also known as Sher Muhammad Khan.[75] Sher Muhammad tried to save the British officers, however, suffered heavy casualties and as a result were forced to retreat to the safety of the Bala Hissar.[75] Shah Shuja then sent his eldest son, Fath Jang, to negotiate with the rebels, only for Fath Jang to urge them to "destroy the infidels" according to the depictions of Jonathan lee.[75] Shah Shuja ordered his artillery to fire upon 'Abd Allah Khan's house, however, he had already taken up a forward position in the qal'a of Muhammad Shah Bayat on the north bank of the Kabul river.[75] As a result, Shah Shuja was cut off from the main British force in the cantonment, and was effectively surrounded with the Bala Hissar under siege.[75]
Factionalism in the Kabul Uprising (2-5 November 1841)
'Abd Allah Khan's attacks marked the beginning of a city-wide revolt in which there were numerous factions fighting for the British, or their rivals.[76] Aminullah Khan Logari, Abd Allah Khan and the Royalists fought on the side of the Sadozai dynasty, directly opposing the British.[76] Opposing them was Nawab Muhammad Zaman Khan, the eldest surviving son of Payindah Khan Barakzai. Muhammad Zaman showed ambitions to try and become Amir or at least Wazir.[76] The Sardars were divided politically, with some supporting the return of Dost Mohammad, and others supporting Muhammad Zaman or even one of the Peshawar or Kandahar Sardars.[76] The uprising in Kohistan surprised Muhammad Zaman and the Muhammadzai, however, in response Muhammad Zaman sent a messenger to Akbar Khan, who was in Khulm.[76] This message urged Akbar Khan to come to Kabul, with a second rider sent to Nawab Jabbar Khan.[76] On 3 November, Jabbar Khan rode into Kabul at the head of Jabbar Khel Ghilzais and occupied the Shah Bagh, a former Mughal garden.[76] The Shah Bagh was a strong position southwest of the cantonment, also controlling the road to the Koh Daman, and one of the fords over the Kabul river.[76] Having secured the Shah Bagh, the Sadars met to discuss the situation, to which they concluded that Nawab Muhammad Zaman Khan would be king.[76] Coins were struck in his name, and mullahs were required to say his name in the khutbah, however Mir Masjidi and other Royalists refused to obey the order.[76]
In the first week of November 1841, Kabul had two rival factions, supporting different kings, and using different currencies.[76] Kabul was divided into four main factions north of the Kabul river, Nawab Zaman Khan, Jabbar Khan, and other Muhammadzai Sardars, supported by sections of the Jabbar Khel and Hamza Khan of Tezin, controlled the Shah Bagh and Qal'a-yi Mahmud Khan.[76] Mir Masjidi Khan and his Kohistanis controlled Behmaru, Qal'a-yi Rikab Bashi and all points north to Pai-yi Minar.[76] In the east, the Jabbar Khel had control of But-Khak and took up position on the Siyah Sang Hills.[76][77] South of the Kabul river, the old city and Hashmat Khan was held by forces loyal to Aminullah Khan Logari and 'Abd Allah Khan, they were backed by the Bayat Qizilbash and the Mullahs of the old city.[77] Shirin Khan and his Jawanshir Qizilbash remained a neutral stance in Chindawal.[77]
Siege of the Cantonment (5 November-23 December 1841)
Both Royalists and those loyal to Dost Mohammad had tried to enter a peace agreement for the withdrawal of British forces but in their favor, while also discussing in an anti-British alliance.[77] One of these agreements led to Nawab Zaman Khan recognizing 'Abd Allah Khan Achakzai as commander-in-chief of all rebel forces in Kabul, this agreement however, did not last long.[77] Nawab Zaman Khan, restless, and wanting to force Macnaughten into a peace, began attacking the cantonment with sniper fire and storming the qala's, which contained most the army's supplies and munitions.[77] The loss meant that there was only three days worth of supply left of food, to which the fighting men were put on half rations, while non-combatants were left to fend for themselves.[77] By late November, the situation had detiorated to the point where horses and camels were being slaughtered for food and to reduce the number of pack animals that also needed feeding.[78]
Inside the cantonment, British officers and political commanders bickered over how to respond to the situation at hand. The situation was not much better as after Burnes's death, Elphinstone's horse stumbled and fell on top of him. Likely suffering damage to his internal organs, and already dealing with Gout, Elphinstone was forced to give orders from his sickbed.[78] Adding on to the number of issues, Elphinstone was meant to have returned to India by this point, as a result, Shelton took this on as meaning that Elphinstone was no longer in command of the army, instead, Shelton took charge.[78]
As grain and ammunition began running out, there were attempts to purchase supplies. Two of Kabul's leaders of the Armenian community helped provide supplies to the British. Khoja Mir, the Malik of Behmaru and father-in-law of Mir Masjidi also sold flour and fodder for heavily inflated prices, then using the cash obtained to finance Mir Masjidi.[78] Mir Masjidi however, was not happy with this action, and as a result, shortly after his forces arrived in Kabul, they occupied Behmaru.[78] ON 10 November, Shelton clashed with Mir Masjidi's Kohistanis, defeating them and occupying Behmaru. Shelton then advanced to Qal'a Rikab Bashi, and Qal'a-yi Zu'l-fiqar Khan and seized it by storm.[78] Shelton also bombarded the Jabbar Khel positions on the Siyah Sang with his artillery.[78] However despite his victories, Shelton lost too much men he could not expend in these battles, as following the fall of Old Charikar a day prior to the battle at Behmaru, thousands of more Kohistanis arrived in Kabul, bringing captured British artillery pieces, muskets, and ammunition.[79] Mir Masjidi and his Kohistanis, now reinforced, re-occupied Behmaru and cut supplies to the cantonment. The Kohistanis then entrenched themselves at the summit of Tepa-Yi-Behmaru, as they begun firing upon the cantonment, making it dangerous for anybody who wandered into the open.[79] Despite the protest of Shelton, Elphinstone ordered him and his men to take Tepa-yi Behmaru and clear it of the snipers that were harassing the British.[79] Before dawn on 23 November, Shelton and his men took control of the eastern slope without any direct opposition.[79] Shelton then lead his artillery pieces to fire on Behmaru village from above.[79] The Kohistanis retreated to the cover of houses, and when Shelton attempted to capitalize on this by sending his men down, they were ambushed.[79] Being harassed from all sides, the storming force retreated back up the hill. The noise of the battle however, woke the Muhammadzais and the Ghilzais in the Shah Bagh, as they armed themselves, they rushed up the eastern flank adjacent to Qal'a-yi Musa'hill, attempting to storm the western side of Behmaru.[79] Shelton, as a result, was forced to divide his forces to repulse the attack, while also stationing an army on the eastern slope to prevent any storming by Mir Masjidi's men.[79] When he confronted the Ghilzai-Muhammadzai armies, his forces were picked apart as the British brown bess muskets were not in reach with the Afghan forces.[79] With Shelton on the brink of defeat, he ordered his men to form two squares, the standard european Infantry defense for facing charging infantry or cavalry, however very ineffective against the Afghan snipers.[79] The battle became a "turkey shoot" as described by Jonathan lee, with Shelton ordering his men to hold their ground, holding the enemy at bay with grapeshot.[79] However when the gun was overheated, it was seized by the Ghilzais storming up the slope. After a short hand-hand struggle, the British were routed and fled back down the hill, facing many dead and wounded that would be even worse if Sardar 'Osman Khan had not ordered his men to halt their fire.[79]
In the aftermath of the rout, Shelton informed Elphinstone that he was no longer able to sally troops from the cantonment due to the lack of men, as from this point on, the high command were trying to see how they could negotiate a withdrawal that would not result in them being faced with humilation, seeking to make peace while also discussing on which faction to make peace with.[79] Since this was a political matter, Elphinstone gave the regard of this to Macnaghten, who in turn, handed it to Lieutenant Trevor to try and negotiate such.[80] Despite the British losses, the Afghan rebels also faced heavy loss, with Shelton's grapeshot having wreaked havoc among Mir Masjidi's men.[79] Several key leaders were either killed or mortally wounded, such as Shah Muhammad Khan of Nijrab, 'Abd Allah Khan Achakzai, who was shot dead, likely to be an assassin amidst the battle.[79] Two of 'Abd Allah Khan's and Aminullah Khan Logari's sons were killed, while two nephews of Dost Mohammad were also killed.[80] Mir Masjidi, who had been severely wounded in a prior encounter died a few days after the battle, with rumors that he was poisoned.[80] Upon his death, his followers left Kabul and returned to the Koh Daman to bury their pir. Leaving Behmaru essentially undefended.[80] However, instead of exploiting the rebels current issues, Elphinstone and Shelton held in passive defense, allowing the Afghan rebels to reorganize and bring reinforcements.[80]
Nawab Zaman Khan had taken more of a reconciliation approach with the British, offering to negotiate the safe withdrawal of British forces from Afghanistan in return for the abdication of Shah Shuja and also possible hope of British recognition that he could be Amir, or king.[81] Akbar Khan however, took a much more hard approach toward the British, as he had a vendetta against Burnes and Macnaghten.[81] After the issue at Behmaru, Akbar Khan rode into Kabul with over 6,000 of the Mir Wali's Uzbek Cavalry. Nawab Zaman Khan could do little to oppose Akbar Khan, allowing Akbar Khan to become the paramount of the Barakzai forces.[81] Determined to take revenge, Akbar Khan sent demands that were tantamount to unconditional surrender according to the depictions of Jonathan Lee.[81] The terms were that the British had to withdraw from Afghanistan as soon as possible, and leave behind all their baggage and Artillery, Muskets, and ammunition to be handed over to the Afghans.[81] And before withdrawing, Macnaghten would have to give a written undertaking that Britain would release Dost Mohammad and for British Officers to be held hostage in Kabul until Dost Mohammad reached Kabul to reclaim the throne.[81] Alongside this, Shah Shuja and his family would have to be handed over to Barakzai captivity.[81] Akbar Khan also threatened that if the British had rejected his demands, he would storm the walls of the cantonment and leave no survivors.[81]
Macnaghten rejected the demands of Akbar Khan, seeking to decide the issue in battle. Akbar Khan however, knew that he could wait out the cantonment, as the winter of Kabul had set in and the lack of food, fuel, and fodder would eventually have the British be forced to accept any of the Afghan terms imposed on them.[81] Rather then storming the cantonment, Akbar Khan tightened the blockade by burning the bridge over the Kabul river to prevent any escape attempt to the Bala Hissar.[81] The Afghans also attacked the harassed British forces in the cantonment with sniper fire.[82] During the last week of November, fighting halted for a bit as Akbar Khan fell ill and the end of Ramadan was celebrated.[82] BY this time, the situation for the British forces was critical, food had run out and camp followers were dying from starvation, while the hospital, already overfilled with hundreds of wounded British soldiers also saw hundreds of Sepoy Indians faced numerous diseases.[82]
In an attempt to salvage the situation, and to undermine Akbar Khan, Macnaghten turned to the Jabbar Khel, offering them a huge sum of over 200,000 rupees in return for food and fodder, as well as an oath of fealty to Shah Shuja.[82] The chief however, declined and told Macnaghten that they had sworn to "fight the infidel to the death".[82] On 10 December, further news came that Nott stated he was unable to send a relief force to Kabul due to Ghazni and Qalat-i-Ghilzai were already under siege as well.[82] It was then of paramount importance that the British reached a face-saving agreement quickly before the occupants of the cantonment starved to death.[82]
On 11 December, Macnaghten agreed to meet and negotiate with Akbar Khan, representatives of Nawab Zaman Khan's faction, and the Ghilzais.[82] Macnaghten then drafted a quick treaty which differed little from what Akbar Khan had previously offered, where the British forces would withdraw as quickly as possible, the release of Dost Mohammad Khan and British recognition of him as the Amir of Afghanistan. Shah Shuja would also be persuaded to abdicate and offered the choice of staying in Kabul or leaving with the British forces back to India.[82] A number of officers would also be held as hostages for Dost Mohammad to reach Kabul, in exchange Macnaghten wished for his army to be fed food, fodder, and be guaranteed safe passage back to India with several Barakzai and Ghilzai chiefs accompanying them as protection.[82] At the end of the article, Macnaghten tried to slip in an article that the British could reside in Kabul, which nobody fell for as they believed it was to save-face with the evident British capitulation.[82] When Macnaghten read the terms of the agreement to the assembled leaders. Akbar Khan interrupted Macnaghten and demanded the British leave the following day with no safe conduct being promised by the Afghans due to the fact that they saw them as "invaders and infidels"[83] and were not entitled to such guarantees.[83] Possibly in reference to Auckland presented Dost Mohammad an Ultimatum, either to go to Lahore and submit to Ranjit Singh, or be invaded.[83]
Akbar Khan's interruptions and counter-demands did not go well with the other leaders in the meeting, he was told to remain quiet for the remainder of the treaty being read out.[83] When Macnaghten finished reading the terms, the leaders calmly debated the pros and cons with a Jirga being held.[83] After two hours, the common consensus was that the terms would be agreed upon minor changes.[83] The evacuation of British forces would occur in three days and Lieutenant Trevor, who had accompanied Macnaghten would act as a hostage and liaison officer between the two sides.[83] The meeting ended though not officially signed or sealed, however the Afghans saw it as binding due to the consensus of the Jirga.[83]
Macnaghten now had to justify what was essentially tantamount to surrender to both Auckland and Shah Shuja, where as per usual, the king was not notified of such negotiations even having taken place.[83] In what was going to be his last letter to Auckland and was not completed, he argued that he had no choice to accept the terms as it was the only way to secure safe passage for the army. Since it was incapable of fighting to Jalalabad, or even beyond to the Khyber pass.[83] When Shah Shuja was informed of the agreement, he was infuriated and refused to abdicate to return to India.[83] As he saw it, it was a betrayal from his British allies, with the treaty they had signed three years earlier being broken.[83]
As per the agreement, all British and Indian forces had to withdraw to from the Bala Hissar to the cantonment. Once this was completed, Akbar Khan and other leaders would be admitted to see Shah Shuja to discuss his future as the head of state in Kabul.[84] Akbar Khan realized this opportunity, with the ability to seize one of the strongest forts in Kabul, to depose or even kill Shah Shuja, and defy all his rivals.[84] As a result, Akbar Khan persuaded Elphinstone to allow his men to escort British troops from the Bala Hissar to the cantonment, Elphinstone accepted unaware of Akbar Khan's scheme.[84] While the evacuation was ongoing, Muhammad Shah Laghmani's Ghilzais tried to force their way into the citadel. However, Shah Shuja, possibly having learned of Akbar Khan's scheme, opened fire with the citadel's artillery, killing and maiming dozens of the enemy, and plenty of Indian sepoys.[84] As a result, Akbar Khan had to abandon his attempt to seize the Bala Hissar.[84]
The arrival of more troops and camp followers further worsened the already critical supply issue for the supply situation in the cantonment for the British.[84] Three days later the weather also worsened, with heavy snow falling throughout the night and all the following day, with the worse winter Afghanistan would see in decades.[84] By this time, the date for British withdrawal had already expired and Macnaghten had to try and justify delays in hope for securing more supplies to complete the journey, as well as cut a deal with factions more willing to compromise.[84]
Akbar Khan's attack on the Bala Hissar did not go well with other tribal leaders and as a result other factions alongside his rivals has begun opening discussion with Macnaghten.[85] On 21 December, Macnaghten informed Lal that several Ghilzai chiefs were prepared to supply food to the British troops during the night of 21/22 December in exchange for over 200,000 rupees, where in return the tribal leaders would then open an audience with Shah Shuja and declare fealty to him.[85] This agreement however, was a double-cross and as soon as the Ghilzai chieftains had sworn fealty to Shah Shuja, Lal was to inform Macnaghten, and then sending a message to Akbar Khan, breaking the December 11 agreement, with the British forces aiming to attack Akbar Khan in the Shah Bagh, while the Ghilzais, Khan Shirin Khan's Jawanshir forces, and Royalist armies would attack from the south.[85] What Macnaghten however did not realize was that Hamza Khan of Tezin and 'Aminullah Khan Logari had influence in both camps, and actively informed Akbar Khan of the coming betrayal from Macnaghten.[86] When Akbar Khan fully learned of the machination, he decided to set a trap that would expose the envoy's treachery to all his rivals.[86]
On the evening of 21 December, Sadar Muhammad Saddiq Khan, Akbar Khan's nephew, arrived at the cantonment and entered a private meeting with Trevor and Macnaghten. The conference was kept secret that even Elphinstone nor Shelton knew about the matter.[86] Saddiq informed Macnaghten that Akbar Khan had changed his mind. Akbar Khan and his father-in-law, Muhammad Shah Khan, chief of the Babakr Khel of Laghman, were prepared to allow Shah Shuja to remain as king on the condition that Akbar Khan be made Wazir.[86] In return, the British garrison would be allowed to remain in Kabul until the spring thaw.[86] The British government would then be able to save face and withdraw claiming they had solved the Afghanistan "problem".[86] Akbar Khan's change of heart however, came at a cost. Macnaghten would have to make an immediate cash withdrawal of 30 lakhs (three million), and guarantee Akbar Khan an annual pension of four lakh rupees for the rest of his life.[86] These terms were similar to the ones imposed by Nawab Zaman Khan and held the prospect of uniting the two rival Muhammadzai factions and Nawab Jabbar Khan's Ghilzais. This deal also had another term where in the morning of the following day, the British would signal their consent to the deal and join forces with Akbar Khan to attack Qal'a-yi Mahmud Khan, the stronghold of Aminullah Khan Logari, and the Bayat Qizilbash.[86] Akbar Khan even offered the envoy the head of Aminullah Khan in return for a suitable reward.[86]
Akbar Khan's plot was a "superb piece of cunning," according to Jonathan Lee.[86] As it had Macnaghten forced to choose between two decisions that would show he would happily betray anybody for his own political gain.[86] The only way out was to reject Akbar Khan's deal, call off his own scheme to attack Akbar Khan, and publicly reaffirm to all parties that they were intent on upholding the 11 December agreement.[86]
Instead, Macnaghten fell into Akbar Khan's ploy and accepted Akbar Khan's proposal.[87] Macnaghten further blundered by agreeing to sign a document brought to him by Sardar Saddiq Khan, confirming Akbar Khan's proposal. Akbar Khan now had direct proof that Macnaghten was ready to betray one party of the resistance for another.[87] When Akbar Khan showed his fellow resistance leaders the signature, there was a response that "their anger knew no bounds", according to Jonathan Lee.[87] It was in particular a blow to Nawab Zaman Khan, who had done everything to try and reach an honorable compromise and restrain Akbar Khan from wielding too much power for himself.[87]
Aminullah Khan Logari was further interested in the Machinations against Macnaghten, as his prior agreement was to work with the British to defeat Akbar Khan. Yet as with the news of the British plan to essentially lure him and his forces out just for Akbar Khan to annihilate them.[87] This also spread to the Ghilzais who had supplied the cantonment. By the next morning, all factions were united by anger and hatred against Macnaghten's betrayal.[87]
Assassination of Macnaghten and Trevor (23 December 1841)


It was not until the early morning of 23 December that Macnaghten then informed his political officers and military high command of the deal struck with Akbar Khan. Macnaghten also informed them that they arranged another meeting before deciding to assault on Qal'a-yi Mahmud Khan, the stronghold of Aminullah Khan Logari.[87] Everybody had condemned the envoy and Macnaghten was warned that the meeting was a trap. Lieutenant Colin Mackenzie warned the envoy that he had been tricked.[87] Macnaghten replied with "let me alone for that, trust me for that".[87] General Elphinstone was also alarmed and wrote to Macnaghten asking him for what guarantees he had from Akbar Khan that he would not be betrayed in this meeting.[88] As for Mohan Lal, he also informed Macnaghten that it was a trap, yet Macnaghten ignored such warnings, believing he had the upper hand. Macnaghten felt so confident in his plan that he went with a handful of officers and not a proper military escort.[88]
Before leaving the cantonment, he informed Shelton to draw up two regiments outside the cantonment. Ostensibly this was to be as backup, however the real intentions were to use the regiments to march on Qal'a-yi Mahmud Khan once the meeting with Akbar Khan ended.[88] Shelton however, did not wish to party such a disgraceful trick against Aminullah Khan Logari. As a result, he told Macnaghten that he was unable to draw up the troops due to them being too busy with preparing for evacuation, as well as how they could never mobilize both regiments in such short amount of time.[88] In the end, the regiments were never assembled, which according to Jonathan Lee, may have led Akbar Khan to believe that Macnaghten and the British were themselves planning to double-cross him.[88]
Akbar Khan's choice of meeting place was a small isolated hillock beside the Kabul river, which would be today's west side of the stadium opposite of the Id Gah Mosque, a location which is marked by a memorial plaque.[88] When Macnaghten arrived, he was surprised to find representatives of most of the rival factions present at the meeting. Including Aminullah Khan Logari's brother, and the chiefs of the Jabbar Khel. Alongside this, there was numerous Armed Ghazis surrounding the meeting place.[88] When Macnaghten spoke up to Akbar Khan about why these men were present at a meeting that was meant to be confidential, Akbar Khan replied, "They are all in on the secret".[88]
Macnaghten did not understand the implication of words said by Akbar Khan, and instead of fleeing for the safety of the cantonment, began to sprawl on the ground as if he was taking his ease.[88] Akbar Khan, noticing Macnaghten did not take the hint, offered him a final chance of redemption by asking him if he was still prepared to carry out the agreement reached the night before. To which, Macnaghten replied "Why not?".[89][90] This expression in Persian signified consent to the agreement as reached. Following this, Akbar Khan shouted "Seize him", and grabbed the envoy by his left hand.[89] Sultan Jan, another Sardar, seized the other hand of the envoy, and together they drove him head first down the slope.[89] The British officers who accompanied Macnaghten were pinned down and pistols put to their heads.[89]
Akbar Khan claimed he had no intention to harm Macnaghten and only planned to take him hostage. However, as Macnaghten led a struggle to try and free himself, Akbar Khan unloaded a pistol into his body, one of a pair that Macnaghten had presented to him the day before.[89] In the uncertainty that followed, the Ghazis pounced upon the wounded Macnaghten and hacked off his limbs, and finally killing Macnaghten by severing his head from his body.[89] Lawrence and Mackenzie, two of the British officers who had accompanied Macnaghten, were saved from a similar fate due to the intervention of Nawab Zaman, whose men fought off the Ghazis and took them to the safety of Qal'a-yi Mahmud Khan.[89] The following day, Nawab Zaman moved the officers to his own house. Lieutenant Trevor was also killed in the surrounding chaos, being cut by Sultan Jan and later hacked to death by Ghazis.[89] The torsos of Macnaghten and Trevor were later hung from a meat hook in the Chahar Chatta Bazaar, while Macnaghtens hands were paraded in triumph throughout the streets of the Old city mounted on a lance.[89] Macnaghten's head was wrapped in a sack and Akbar Khan sent the sack to Mir Wali of Khulm.[89] Three days later, the remains of Macnaghten's torso was thrown in a ditch near the smouldering ruins of Burnes's house.[89]
Inside the cantonment, there was confusion as to what occurred and the fate of Macnaghten as well as his accompanying officers.[89] It was not until the following day that the confirmation of Macnaghten and Trevor's death, as well as numerous officers were taken prisoner had came in.[89] A few days later, Eldred Pottinger, who was now in charge of Political affairs, received a letter signed by Akbar Khan. Aminullah Khan Logari as well as other leaders had demanded the British follow the terms of the 11 December agreement, alongside additional demands such as that the army must leave immediately, as well as abandoning all of its treasure, except for funds needed for road expenses, must be handed over to the Afghans alongside all but six guns and most of the ammunition.[89] The wives of the Senior officers were also to be surrendered as hostages until Dost Mohammad Khan would return to Afghanistan. In return, Akbar Khan pledged that he and other leaders would accompany the army and ensure their safe passage. As for Shah Shuja, he could choose to stay in Kabul, or go with the British army that was withdrawing.[91]
British Withdrawal and Massacre at Gandamak (December 1841-January 1842)

Pottinger refused the conditions given by Aminullah Khan Logari and persuaded Elphinstone to march the troops into the Bala Hissar, however he was ignored. As due to the assassination of Macnaghten, Elphinstone and Shelton led a de-facto coup over Shah Shuja's power, placing themselves solely in charge of military and political affairs.[92] The army continued to fight for survival for over three weeks. As December came, many camp followers died from exposure due to the extreme cold. On 1 January 1842, a new treaty was affirmed with even harsher terms of withdrawal.[92] The new treaty recognized Nawab Zaman as regent instead of Akbar Khan. Pottinger drew up bills of the East India Company treasury and ceded over 14 and a half Lakhs (1.4 Million) rupees, which was divided among Akbar Khan, Nawab Zaman, Aminullah Khan Logari, Khan Shirin Khan Jawanshir, Sardar Osman Khan, and several other Ghilzai chiefs.[92]
On 6 January 1842, 4,500 British and Indian troops, alongside 11,500 camp followers set out in the deep snow and freezing conditions for Jalalabad.[92] Following the evacuation, what remained of Shah Shuja's forces deserted, and the escort promised by Akbar Khan never arrived, and before the cantonment was evacuated, looters already pillaged houses and killed stragglers.[93] In an attempt to escape the Massacre, British camp followers rushed forward to seek the protection of the British rearguard, which only in effect spread chaos and hampered the troops.[94] Organization broke down within the army and the British column was strung out for several kilometers along the road to the route of Jalalabad.[94] This left the British forces exposed and susceptible to Ghilzai raiders and plunderers.[94]
Early on in the withdrawal, Akbar Khan led a ploy into a conference meeting, capturing Elphinstone, Shelton, Florentia Sale, and Trevor's wife and children were captured by Akbar Khan.[95]
.jpg.webp)
After two days of march, the British force only traversed 16 kilometers to But Khak.[94] As the British force continued advancing, they were ambushed by the Jabbar Khel and other Ghilzais, picking them off from the safety of heights in the hilly and mountainous positions around the valley of Khurd Kabul. After five days, the British force was significantly reduced to the point where they had lost over ~16,000 of the men, women, and children who had set out from Kabul, many also died from exposure in the cold, while the wounded were too exhausted to continue.[94]
By the time the remnants of the British force arrived at Gandamak on 13 January 1842, all that remained of the army was twenty officers, and 45 men of Shelton's regiments.[94][96] Gandamak was meant to have some of Shah Shuja's forces there to continue the withdrawal, however, they were only further met by Ghilzais.[94] The Ghilzais attempted to disarm the soldiers, however a skirmish occurred, leaving all but three dead of the remaining force as the British led a last stand against the Afghans.[94]

At around one o'clock in the afternoon of the same day, William Brydon rode up to the fort on his horse waving his forage cap as one of the sole survivors of the march.[94] According to Jonathan Lee, William Brydon was "more dead then alive", with wounds such as slashes to his wrist, and "part of his skull was hanging off".[95]
The Situation of Afghanistan (November 1841 - March 1842)
Following the Massacre at Gandamak, Pollock, who was in command of Jalalabad, held out against Afghan siege.[95] The Hotaks and Tokhi rebelled, capturing Ghazni and forcing the British force to retreat to the citadel. Qalat was also besieged but held out in the winter.[95] Nott, who was in charge of Kandahar, beat off an attempt to storm Kandahar and went on the offensive in southern Afghanistan after defeating a Durrani tribal revolt led by Safdar Jan, Shah Shuja's son, who had defected in favor of the rebels.[95] Nott also evicted thousands of men, women, and children from Kandahar as he was suspicious of possible plots against him and their loyalty to British rule in the region.[95]
When news of the Kabul uprising came to Auckland, he ordered for British reinforcements sent to Peshawar and Quetta, however, the Afridi tribesmen had blocked the Khyber pass and overran the fort of Ali Masjid.[95] In early February 1842, Brigadier Wild unsuccessfully attempted to breach the Afridi blockade. As a result, Pollock, who commanded the "Army of Retribution",[95] decided to wait until the spring in Peshawar for reinforcements from Auckland to arrive, as well as for his troops morale to improve.[97]
Retribution Campaign (March 1842 - April 1842)

On 31 March 1842, Pollock marched from Peshawar with 8,000 men to clear the Afridi blockade of the Khyber. After a short skirmish, the Afridis abandoned Ali Masjid. The British army hence met little resistance on their continued march through the Khyber pass.[98] When Sale heard of Pollock's victory, he lead a Sortie from Jalalabad and defeated Akbar Khan's forces in battle, recovering many guns from the Kabul garrison that was seized.[98]

on 16 April, Pollock's forces reached Jalalabad, forcing Akbar Khan to abandon the siege and flee to the safety of his father-in-law's tribe in Laghman.[98] The force Auckland ordered sent from Quetta reached Kandahar in early May and relieved the beleaguered garrison of Qalat. However, the British force were too late to save the Ghazni force, with the British forces in Ghazni under Colonel Palmer surrendering in March 1842 in a pledge of safety. However, when the British forces came out into the open plains following their surrender, they were attacked and almost entirely annihilated, with only a few surviving officers being taken hostage.[98] Nott marched from Qalat to Ghazni and defeated the Ghilzais and then marched to Kabul, attempting to join Pollock, who was also advancing on Kabul.[99]
Assassination of Shah Shuja (April 1842)
As Pollock and Nott were advancing to Kabul, the chaos inside the city grew further. Shah Shuja was pressured by Mir Hajji, who demanded he take command of the Kohistani troops and march on to defeat the advance made by Nott and Pollock. Shah Shuja did not trust Mir Hajji and did not leave the safety of the Bala Hissar.[100] In early April, as Pollock was advancing to Jalalabad and relieve the siege of the city, Mir Hajji sent an ultimatum to Shah Shuja, demanding he take up arms against the British or he would be declared "an infidel and friend of infidels".[100] Shah Shuja capitulated and agreed after Nawab Zaman sent his wife to him with an oath sealed on the Quran, vowing him protection from Harm.[100] Two days later, on 5 April 1842, he left the Bala Hissar fort with some Indian retainers.[100] However Shah Shuja was stopped by Shuja Al-Daula, Nawab Zaman Khan's son, alongside sixty other men who shot Shah Shuja and killed him.[100] His body was left to rot in a ditch for three days before being buried in an unmarked grave near Timur Shah's tomb.[100] According to Vincent Eyre, one of the British hostages held by the Afghans, Shah Shuja's killing was instigated by a Ghilzai chief, Dost Muhammad Khan on the account of retribution for an earlier attempt on Akbar Khan's life.[100]
Shah Shuja's assassination was condemned by the populace, especially since Nawab Zaman Khan swore an oath on the Quran to protect him. In an attempt to repair his reputation, Nawab Zaman Disinherited Shuja Al-Daula and banished him from his Prescence.[100] Shah Shuja's son, Fath Jang succeeded his father in an attempt to hold rule under himself, however, his authority did not reach beyond the Bala Hissar.[100]
Chaos in Kabul (April 1842 - August 1842)
Following the death of Shah Shuja, many of the rival factions in Kabul aimed for power themselves. Outside the walls of the Bala Hissar, Nawab Zaman Khan, Mir Hajji, and Aminullah Khan Logari fought each other for control of Kabul. Shah Fath Jang demanded that Aminullah Khan and Mir Hajji attack Nawab Zaman Khan to avenge his fathers death.[100] However, Nawab Zaman Khan bribed Mir Hajji by handing over John Conolly as a form of compensation. Mir Hajji then relieved Conolly of large sums of money, also forcing him to sign credit notes on behalf of the Calcutta treasury. Mir Hajji used this to pay his troops and bribe his rivals.[101] Aminullah Khan attempted to regain the loyalty of Mir Hajji by granting him the right to taxes on houses in the old city.[101]
At the end of April 1842, Aminullah Khan and Nawab Zaman clashed again, on this occasion to control the Kabul customs house.[101] In an attempt to restore order, Nawab Zaman proposed that these revenues would be given to Mir Hajji instead to pay for the war against the British.[101] Aminullah Khan's response was to arrest Mir Hajji, drawing the Kohistani ghazis into conflict.[101] Mir Hajji was released after he pledged loyalty to Shah Fath Jang, but he renounced his oath when he was released and joined forces with Nawab Zaman Khan.[101] Aminullah Khan sought refuge in the Bala Hissar following the formation of this powerful alliance, to which Shah Fath Jang allowed him sanctuary, but did not allow his 4,000 troops to enter the Bala Hissar, forcing his troops to return home as a result.[101]
Mir Hajji and Nawab Zaman besieged the Bala Hissar, however, Akbar Khan and Muhammad Shah arrived in Kabul with a large force of Shinwaris and Babakr Khel Ghilzais.[101] Nawab Zaman Khan had no choice but to relinquish command of the Muhammadzai forces back to Akbar Khan.[101] Akbar Khan dispatched an intercepted message from India ordering Pollock to withdraw to Aminullah Khan Logari, which broke morale that any British force would come to the rescue of Shah Fath Jang, leading to most the defenders of the Bala Hissar surrendering.[101]
Shah Fath Jang refused to capitulate, believing he would be put to death if he did.[101] As a result, Akbar Khan sent forces to occupy the Sher Darwaza heights, then mounting a British field gun on the Bala Burj, the tower that dominated the upper Bala Hissar, and opened fire upon the defenders.[101] On 7 May, Darwish Muhammad Khan, commander of Shah Fath Jang's Ghulams, opened the citadel gates of the Bala Hissar to Muhammad Shah while Akbar Khan and his retinue stood guard to prevent Nawab Zaman or any other of his rivals to enter the citadel.[101] Fath Jang was confined to a small room in the upper Bala Hissar, and over the ensuing weeks, Akbar Khan seized what wealth remained from the King, using such to buy the loyalty of the Qizilbash and Nawab Zaman's Barakzais.[102]
Following the fall of the Bala Hissar, Nawab Zaman's followers deserted him, forcing him to appeal to Mir Hajji to recognize his right to the throne by reading his name in the Khutbah.[103] Mir Hajji only agreed to do this if he took charge of the Ghazis who had been doing little at But Khak for over three months, and march against Pollock who was now in control of Jalalabad.[103] Nawab Zaman refused this and argued for negotiations instead with the British. However, Mir Hajji rejected any attempts of a compromise.[103] A few days later, Akbar Khan called his own Kabul "Ulama" and proclaimed Shah Fath Jang as King-regent, with himself as Wazir as they waited for the return of Dost Mohammad from British India to restore him on the throne.[103] Nawab Zaman Khan and Khan Shirin Khan Jawanshir boycotted the meeting. As a result, Muhammad Shah's Ghilzais attacked Nawab Zaman, Hamza Khan of Tezin, and Khan Shirin Khan Jawanshir, who all eventually surrendered.[103] Nawab Zaman Khan's life was spared, but he and many other sardars, specifically rivals of Akbar Khan, were imprisoned.[103] Khan Shirin Khan Jawanshir was deposed as head of the Jawanshir Qizilbash and was forced to surrender Mohan Lal Kashmiri to Mullah Jalal Achakzai, the mir'wais of Pul-I-Khesti mosque, who tortured Mohan Lal and extracted large sums of money from him.[103] Mohan Lal still continued to spy on Afghan affairs to report to Pollock who was advancing on Kabul.[103]
Pollock's Campaign (August 1842 - October 1842)

When Akbar Khan heard the news of Pollocks advance on Kabul, he began assembling an army to march out and meet him. This mobilized force included the British trained Janbaz and Hazarbashi corps.[103] Since Akbar Khan had already drained Fath Jang of his wealth, he forced him to abdicate and replaced him with his younger brother, Sultan Shahpur.[103] Akbar Khan also imposed a Jihad tax on shopkeepers in Kabul.[103] Akbar Khan attempted to negotiate with Pollock over the hostages he had as a bargaining chip. However, his negotiation attempts were rejected. Despite this, conditions of the hostages improved and even some of their seized property was restored.[103]
On 20 August 1842, Pollock set out for Kabul after subduing the Shinwaris, also accompanied by Robert Sale.[104] Sale's experience in fighting the Afghans proved valuable to Pollock, as he also raised a Afghan Jezail force, with their firepower in battles actively bringing it to Pollock's favor.[104] Akbar Khan and the Jabbar Khel were waiting for Pollock, in expectation that Pollock's retribution attempt would end in massacre as the army at Gandamak did in an attempt to withdraw.[104] As Pollock's force advanced up the road to Kabul and reached Gandamak, the British troops witnessed the remains of their former comrades, with the bodies still rotting and picked on by vultures eight months after the disaster.[104] As they advanced to Kabul, Pollock began skirmishes with Akbar Khan's army, sending his troops to storm the heights and disperse the enemy with bayonet charges.[104] Akbar Khan was defeated in battle twice in these instances, forcing him to flee north to Ghurband, while Pollock occupied the Bala Hissar unopposed.[104] Kabul, however, was mostly deserted as most of the population had fled to the Koh Daman. The Hindu traders and moneylenders however, stayed behind.[104] A few days after, General Nott arrived in Kabul following his long march from Kandahar. Among the loot brought with him was the sandalwood gates from the tomb of Mahmud of Ghazni which was believed that it was pillaged from the Hindu temple of Somnath leading to the The Proclamation of the Gates, which ordered the British army to bring it back to British India.[104]
Despite the fall of Kabul, the British hostages were still in Afghan hands, to which Akbar Khan ordered them moved from Laghman to Bamiyan, seeking to send them to the safety of Khulm.[104] However, Akbar Khan entrusted this task to Muhammad Saleh Muhammad Khan, one of Shah Shuja's cavalry regiment commanders.[104] When Khan Shirin Khan heard Saleh Muhammad was leaving for Bamiyan, he offered him a large sum of money to hand over the hostages. Saleh Muhammad accepted and set out for Kabul, while Khan Shirin Khan and his Jawanshir accompanied by British officers rode out to intercept him and freed the hostages.[105]
The rescue mission saw Shelton freed, however, Elphinstone died in captivity in April after succumbing to his wounds and exhaustion.[104] Akbar Khan packed his body in a coffin and sent it to Sale in Jalalabad for burial. However, it was intercepted by Muhammad Shah Ghilzais, who stripped the corpse, pelted rocks to stone the corpse, and attempted to burn it. The burning was prevented by Akbar Khan's escort party, and the body was transported to Jalalabad where he was given a burial. His body was later exhumed for re-burial in Calcutta.[105]
Having secured Kabul, Pollock sent Major General McCasKill into the Koh Daman to capture or kill the rebel leaders.[105] His first objective was Istalif, where Aminullah Khan Logari was said to have concentrated forces.[104] But Aminullah Khan had already fled. Despite Istalif being overflowed with thousands of displaced people from Kabul, McCasKill ordered his troops to attack, killing thousands of men, women, and children in a massacre.[105] Houses and Bazaars were also set on fire. The massacre was still targeted even though the elders of Istalif had provided support to the British cantonment, as well as the pir of Istalif having sheltered Pottinger the night they fled from Charikar.[105] McCasKill then advanced on to Charikar, and continued dealing massacre's in the region, but was unable to capture or kill any rebel leaders that had fled, eventually being recalled to Kabul.[106]

Pollock, who wished to also lead in retribution, was determined to destroy a major monument in the city of Kabul. He first aimed at the Bala Hissar, however turned away from this after being reminded that it was the seat of the Sadozai Monarchy.[106] He then turned his sights to the Char Chatta, or the Grand Bazaar, and ordered the complete destruction of it.[106] Several other monuments were also destroyed, including the Masjid-i-Farangi, or Franks Mosque, which was built over the site where Macnaghten was assassinated.[107]
The troops sent to destroy the Bazaar got out of hand, and began burning for revenge as well as killing anyone who stood in their way.[107] By the time order was restored, many of the wooden houses and shops in the Old city, which dated back hundreds of years, were ablaze and left to flames.[107] When Pollock finally withdrew two weeks later, the flames were still blazing in Kabul.[107]
When Pollock began to withdraw, many of the Hindu Baniyas decided to accompany the British army back to India, for they not only had lost their homes and livelihoods, but they also feared the reprisals that they would be met with when the British forces had fully withdrawn.[108] Fath Jang joined the British force in withdrawing, however, Shahpur stayed behind until months later where he fled to Peshawar.[7]
Evaluation and end of the war
The war was a disaster for the British, as they suffered heavy economic losses for the British East India Company who spent Millions of pounds in funding the war, this also in particular became a large issue early in the war, and forced Macnaghten to attempt to cut a lot of spending, the economic consequences were so severe that the East India Company was plunged into debt and with a severe budget deficit.[7] British Military prestige was also hurt from the war as it was believed that Kabul, and Afghanistan in general was a weak and uncivilized nation, combined with the heavy loss of life and senior officers, however many officers would gain experience from this and later benefit off of this experience in the later Sepoy mutiny.[7][109]
Politically, Sadozai power was essentially eliminated, as this was the last attempt for a Sadozai to try and seize the throne of Afghanistan again.[7] The Barakzais from then on remained the complete hegemon over the throne of Afghanistan.[7] Dost Mohammad Khan was also allowed to return to Afghanistan following the withdrawal.[7] Dost Mohammad, alongside Akbar Khan and Mir Masjidi would become "national" heros of Afghanistan.[7] The Afghan capital's diplomatic quarter is also named after Wazir Akbar Khan, Wazir Akbar Khan, Kabul.[10]
Return to Rule and Unification of Afghanistan (October 1842-9 June 1863)
In October 1842, Dost Mohammad was permitted to return to Afghanistan.[110] He moved by Shikarpur and Lahore, and entered Afghanistan by the Khyber, resuming his government in 1843.[110] Upon his return to the throne of Kabul, his sphere of influence was much smaller then prior to the British invasion.[111] Apart from Kabul itself, he only had control over Jalalabad and Ghazni proper.[111] The Kohistani chiefs had grown to a powerful position and began collecting revenue on their own behalf, while Behsud capitalized off the interregnum to seize independence for itself.[111]
Dost Mohammad's first priorities upon returning to rule was to reassert his country which was devastated by war. Kabul was in ruins as a result of fighting and the destruction caused by the Army of Retribution.[112] The rich agricultural regions of the Koh Daman and Tagab were devastated by Sale's scorch earth policy, and trade was also at a stand-still, with the Hindu Baniyas having fled back to British India upon British withdrawal, taking their wealth with them as well.[112] The region also suffered major food shortages as well as fodder as a result of the country's reserves being used up by the Army of the Indus.[112] The use of grapeshot also left thousands of Afghans maimed for life, with thousands also displaced from their homes, with many having lost what remained of what they possessed.[112] These losses had an impact on Agricultural output and state revenues.[112]
Upon Dost Mohammad's return and the resumption of his rule, Akbar Khan ordered the city illuminated for 7 days, and tribal leaders were invited to Kabul to pledge loyalty to Dost Mohammad.[113] Dost Mohammad, in an attempt to conciliate rival factions, pardoned those who fought against Akbar Khan or aided the British and appointed some to his inner council such as Nawab Jabbar Khan, Khan Shirin Khan Jawanshir, Hafizji, and Sher Muhammad Khan Bamizai.[113] Dost Mohammad also gave Sultan Mohammad Khan, his brother and the last of the Peshawar Sardars a seat on this council.[113] One individual who was not reconciled with was Aminullah Khan Logari, who was sentenced to spend the rest of his days in Prison.[113] Akbar Khan was also in a powerful position, to the point where he had become the Wazir and heir apparent to Dost Mohammad, despite not being Dost Mohammad's eldest son.[113]
After the withdrawal of General Nott, Kohan Dil Khan re-occupied Kandahar and became a safe haven for Muhammadzai sardars who were opposed to Dost Mohammad Khan.[114] A year after Dost Mohammad Khan returned to Kabul, Kohan Dil Khan marched on Kabul in an attempt to depose Dost Mohammad. After an inconclusive encounter near Ghazni, Kohan Dil Khan pledged his allegiance to Dost Mohammad on the condition that he remained the Autonomous governor of Kandahar.[114] Kandahar did not enter the rule of Dost Mohammad Khan however, and still remained de-facto independent.[114]
Dost Mohammad made it his priority to establish a more professional army and to use less unreliable tribal levies and Ghulams.[114] Wazir Akbar Khan and his brothers were required to raise and equip five regiments, totaling around 4,000 men, which became the core of the national army that was just reforming.[114] Much of these troops were among the British trained Janbaz and Hazarbashi regiments, they also wore European-style uniforms, and were armed with muskets pillaged or captured from British armies.[114] This also included several British artillery pieces including siege guns, and a vast store of ammunitions.[114]
Dost Mohammad Khan's consolidation campaigns (1843-1844)
Seeking to begin consolidation of his territory following his resumption of Amirship, he attempted to see the effect of reforms the new army had by sending them on military campaigns. Sardar Afzal Khan and Akbar Khan were sent into the Kunar to subdue the Khan of Bajaur, only to abandon the campaign as a result of fierce resistance.[114] Dost Mohammad Khan then sent Akram Khan in a campaign in the Hazarajat. Akram Khan brought Behsud, Dai Zangi, Day Kundi, and Bamiyan under Dost Mohammad Khan's rule, successfully subjugating much of the Hazarajat regions.[114][115] When Akram Khan returned to Kabul, he was given large sums of cash for his successful conquest.[114]
Situation in the Hindu Kush (1844-1849)
In early 1844, Mir Wali of Khulm came to Kabul to re-affirm his alliance with Dost Mohammad, also bringing news that disturbed the balance of power in the region.[116] Yar Mohammad Khan, who had taken control of Herat after deposing Kamran Shah Durrani, had defeated the Sunni Hazaras of Qala e Naw and was preparing to invade the Chahar Wilayat.[116] In this end, he signed a treaty with the ruler of Bukhara, who agreed to assist Yar Mohammad in his conquest in return for recognition of Bukharan hegemony over all territory from Aqcha to Qataghan.[117] Even more alarming to Dost Mohammad was the claim Mir Wali made that when Balkh fell, Yar Mohammad and Nasrullah Khan of Bukhara planned to march on Kabul and depose Dost Mohammad Khan and place Yar Mohammad on the throne.[118]
Dost Mohammad Khan took this threat seriously and prompted Mir Wali to pre-empt a move by occupying Balkh in Dost Mohammad Khan's name.[118] Mir Wali, however, was not prepared to risk a war with Herat and Bukhara, and refused.[118] Mir Wali then appealed to Dost Mohammad Khan for military assistance, to which Dost Mohammad demanded an Afghan Hakim to reside in Khulm.[118] Mir Wali rejected this as it would take away his own sovereignty and traditional autonomy as ruler of Khulm, and rejected this demand as well.[118] This led to further diminished relations between the Mir Wali and Dost Mohammad Khan. When Mir Wali was allowed to return to Khulm, he ordered the name of the Khan of Bukhara to be read in the Khutbah, an action that provided Dost Mohammad the Casus belli to invade Balkh.[119]
In the mid 1840's the Wilayat of Balkh was in turmoil, beset by dynastic wars, plagues of locust, and cholera outbreaks, the economic situation in the region was also so dire that people sold their children into slavery in order to feed themselves.[120] The Chahar Wilayat was being torn apart by succession crisis in the death of Zu'l-fiqar Khan, the ruler of Sar-I-Pul, Mizrab Khan, the ruler of Maimana, and Shah Wali Khan, the ruler of Andkhui.[120] Rival claimants in the Chahar Wilayats fought each other for hegemony over one another. Often seeking support from their neighbors, including Yar Mohammad in Herat, and the Khan of Bukhara.[120] When Ghazanfar Khan appealed for Bukharan aid against his rival, Shah Wali, Nasrullah Khan of Bukhara passed him over to Mir Wali, who joined forces with Ishan Uraq and Ishan Sudur, the Bukharan governors of Balkh and Aqcha. Alongside Shuja'al-din, the mutawalli of Mazar-I-Sharif, and Mahmud Khan, the ruler of Sar-I-Pul.[120] Together, they subdued Hakim Khan of Sherberghan and reinstated Ghazanfar Khan.[120] But as soon as Mir Wali and his allies withdrew, Shah Wali retook Andkhui, backed by Hukumat Khan, the ruler of Maimana, and Hakim Khan, the ruler of Sheberghan.[120] Hukumat Khan in Maimana then appealed to Yar Mohammad Khan for military aid to depose his rival and half-brother, Sher Muhammad Khan, an appeal for aid that provided justification for Yar Mohammad Khan to invade.[120] He marched on Maimana with an army of around 10,000 men and forced Sher Muhammad to flee for his life, reinstating Hukumat Khan as ruler of Maimana.[120] Ghazanfar Khan then petitioned Yar Mohammad and Hukumat Khan to help him depose Shah Wali, to which they agreed.[120] Andkhui fell after a short siege and was pillaged by Herati troops, who slaughtered the settlement's Turkman population.[120]
Following this victory, Yar Mohammad marched on Balkh, however its garrison refused to surrender.[120] As winter was already setting in, and his armies supplies were low, Yar Mohammad decided not to risk besieging the citadel and ordered his troops to return to Herat.[120] As they journeyed to Herat, many died to exposure of the extreme cold and starvation as they passed through the snowbound passes of the Murghab watershed.[120] In the following year, 1849, Yar Mohammad marched on Maimana. However, Hukamat Khan, refused to allow Yar Mohammad to enter his capital, prompting Yar Mohammad to settle for a siege.[120] Yar Mohammad besieged Maimana for Eleven months, but had to admit defeat and returned to Herat. His invasion of the Chahar Wilayat however, paved the way for the rise of Dost Mohammad Khan in the region of Turkestan.[120]
Death of Akbar Khan and conflict with Muhammad Shah Khan (1847-1857)

In September 1847, tragedy struck with a large Cholera outbreak, it led to the death of hundreds of people in Kabul and also forced Dost Mohammad Khan alongside his court to move to Chahar Asiyab. Despite this, Wazir Akbar Khan was infected by Cholera, and later died. Akbar Khan was in his early thirties and in accordance with his will, he wished himself buried in Mazar-I-Sharif, this later evoked fears that Dost Mohammad would attempt to conquer Mazar-I-Sharif.[121]
Following Akbar Khan's death, Dost Mohammad decided to break the power of Akbar Khan's influential father-in-law, Muhammad Shah Khan, head of the Babakr Khel Ghilzais.[122] Muhammad Shah demonstrated a large role in the siege of the British cantonment and Jalalabad, and even assisted Akbar Khan to seize Kabul itself, and the Bala Hissar.[122] However, his power was seen as a threat and since Akbar Khan was no longer alive to protect Muhammad Shah Khan, Dost Mohammad Khan set to act upon it.[122]
Muhammad Shah, informed by sympathizers of Dost Mohammad Khan's intentions, fled to his stronghold of Badiabad in Laghman, while the Jabbar Khel would often raid caravans between the Kabul-Jalalabad road.[122] Dost Mohammad Khan set out to Nangarhar to supervise the operations in person, and by pacifying the Jabbar Khel by restoring state payments for safe passage.[122] Dost Mohammad marched up the Alishang river, and it took nearly two years for Badiabad to fall, only for Muhammad Shah to retreat in the high mountains of Kafiristan, from where he raided the plains of Nangahar and intrigued revolts in Tagab, Nijrab, Gulbahar, and Parwan.[123] In 1855, Muhammad Shah even captured Shah Muhammad Khan, the nephew of Dost Mohammad Khan, who was released after a large Ransom payment.[116]
In early 1857, Muhammad Shah died of mysterious circumstances, but the revolt continued to simmer away until the end of Dost Mohammad Khan's reign.[116]
Second Anglo-Sikh War and Conquest of Balkh (1849-1850)
Whilst Yar Mohammad tried to subjugate Maimana, Dost Mohammad Khan began assembling armies in Bamiyan for war in Turkestan.[124][125] In July 1848, Akram Khan, at the head of a large force, set out for Bamiyan from Kabul. In the same month, gifts from Khulm, Saighan, Kunduz, and Mazar-I-Sharif arrived in Kabul for the Amir in an attempt to stall the invasion planned by Dost Mohammad.[6] The invasion however, was postponed due to the Second Anglo-Sikh War.
In hope of securing Dost Mohammad's cause, Chattar Singh offered Dost Mohammad Peshawar if he supported the Sikhs in the conflict.[6] Chattar Singh went back on his offer and gave it to Sultan Mohammad Khan, and Pir Muhammad Khan, two Barakzai sardars.[6] Dost Mohammad, however, sent five thousand men under Akram Khan to fight alongside the Sikhs regardless.[6] Dost Mohammad also visited Peshawar in person, and laid claim to Kashmir, a lost province of the Durrani Empire.[126] Dost Mohammad also urged the Qandahar Sardars to invade Sindh.[126] Following British victory at Gujrat, Dalhousie, Governor-General of India, declared the annexation of the Punjab.[126] As British forces advanced on Peshawar, Afghan armies abandoned the city and returned beyond the Khyber pass.[126] The occupation of Peshawar by the British spread panic in Kabul, as it was expected that due to Afghan aid to the Sikhs, the British would retaliate by marching through the Khyber pass and would wage another war on the Afghans.[126] The feared invasion, however, did not occur and allowed Dost Mohammad to return his concerns to Turkestan once again to begin his conquest north of the Hindu Kush.[126]
In the spring of 1849, Akram Khan was sent to Bamiyan with a large army and instructions to conquer "Lesser Turkestan".[126] This brought a provoked response from Mir Wali, who assembled his armies and attacked an Afghan outpost south of Aybak, expelling its garrison and killing or wounding some 50 Afghan Jezailis in the process.[126] Following this incident, Mahmud Khan, the ruler of Sar-I-Pul and many other rulers of lesser Turkestan came to aid of Mir Wali against Dost Mohammad Khan.[127] In late August, Dost Mohammad sent letters to the Mir Wali, informing him that Akram Khan wished to visit Khulm. If the letter was accepted, it see that an Afghan garrison and an Afghan Wakil be sent to Khulm to oversee Mir Wali's affairs, tantamount to annexation.[128] To further reinforce these demands, Akram Khan marched to Khulm at the head of three thousand men, six guns, and a string of fifty-five camel loads of stores.[128] These provisions were vital especially in a battle or a siege as Balkh during this time was ongoing a large Famine.[128] At the end of September 1849, Mir Wali gave his response to Dost Mohammad, rejecting his demands on the basis of that Akram Khan's visit was not "convenient", and had to be postponed. However, Mir Wali's reply is said to have "disgusted" Dost Mohammad.[128] The Mir Wali's refusal to the ultimatum provided Dost Mohammad the justification he needed for war.[128]
Akram Khan's campaigns were beset by issues from the start. Some influential Barakzai Sardars were opposed to the invasion and refused to send regiments for the invasion of Balkh.[129] The morale of the Afghan forces was also quite low, as the soldiers were reluctant to leave their own country into a foreign one, the Afghan troops payments were also delayed.[130] When Akram Khan persuaded his men to finally march out of Bamiyan, he faced other issues. In order to finance his campaign, Akram Khan sent his troops to collect revenues and seize supplies from the semi-independent Hazara tribes around Saighan and Kahmard.[130] The rich and fertile Ajar valley was a target in these campaigns. However, Akram Khan's tax collectors were noted to be oppressive toward the local populace, leading to many of them being put to death and rebellion spreading throughout the valley.[130] The people of Saighan, having heard of Akram Khan's tax collectors behaviors toward the local Ajari populace, fled to the hills to avoid the same fate.[130] It took Akram Khan two to three weeks to re-consolidate the region under his control, with one occasion the Afghans being put to flight with the loss of some eighty men.[130]
The Ajar rebellion and distraction upon Akram Khan gave Ishan Uraq and Mir Wali sufficient time to begin gathering their forces and prepare proper defenses against Akram Khan.[130] Despite the death of Shuja'al-Din, the ruler of Mazar I sharif in Autumn of that year, the rulers of lesser Turkestan remained united against Akram Khan.[130] An army of twelve thousand men with twelve guns, under the command of Ishan Uraq and Mir Wali was sent south into the mountains to block the Afghan advance, and when at the end of November, Akram Khan resumed his march north, he found the sizeable force of Mir Wali and Ishan Uraq well entrenched across his line of advance.[131] For nineteen days, Akram Khan was held up "in a pass"[132] unable to break the entrenched defenses of the Turkestan force. Winter, which came early to the Hindu Kush also set in. Akram Khan had the options to fight his way through the Samangan plains, or stay put and risk becoming snow bound in the no-mans land between Khulm and Kahmard.[132] His only other option was to return to Bamiyan and spend the winter there before marching north again. This, however, saw the risk of being attacked by Uzbeks, or even a provoked Hazara rebellion.[132] In the end, Akram Khan decided the best course of action was to negotiate a face-saving agreement, hoping that he could retire south and that the reinforcements he requested from Kabul would arrive to launch another campaign the following spring.[132] An agreement was reached under the terms that Akram Khan acknowledged the Mir Wali's right to Khulm. Akram Khan also recognized the other independent states and governors of lesser Turkestan such as Aqcha, Balkh, Mazar-I-Sharif, and Sar-I-Pul.[132]
When Dost Mohammad Khan was informed of the Ajar rebellion and the treaty signed by Akram Khan, he was enraged.[132] He condemned Akram Khan for failing to retire to Bamiyan after the suppression of the Hazaras in the region, and for ceding official recognition of Mir Wali to Khulm, and Bukharan sovereignty over Balkh.[132] Dost Mohammad's temper was not improved after many Barakzai Sardars still refused to march to Akram Khan's aid and support his campaign. Dost Mohammad refused to ratify the treaty agreed upon and ordered Akram Khan to "gamble everything" on the campaign in Balkh.[132] In spite of the extreme cold and frost, Akram Khan immediately followed through with his fathers orders and in a matter of weeks, successfully took Khulm.[132] This was due to Mir Wali and Ishan Uraq having disbanded their armies after being satisfied with the agreement that was drafted, and were taken into complete surprise when the Afghan army re-engaged its offensive into the north.[132]
By early January 1850, Akram Khan had seized possession of Balkh and installed an Afghan garrison in the city. Following this victory, many local rulers paid their homage and respect to Akram Khan.[132][124] Following the fall of Khulm, Mir Wali was also forced to flee across the Oxus.[133][134]
Dost Mohammad Khan was extremely satisfied with the conquests of Akram Khan and his recent victories in Balkh. His desperate gamble to win Balkh had won off and the British threat to invade the country had alleviated.[134] Leaving him open to continue his wars of unification. The first winter the Afghans experienced in the north of the Hindu Kush was difficult. Apart from the extreme frost, local scarcity and supply lines to the south were poor, what was left of the population of Balkh also refused to sell food to their new overlords.[134] In an attempt to undermine their opponents, the Afghans spread rumors that Mir Wali had been captured and was prisoner in Kabul, yet he had actually fled across the Oxus.[134][133] Instead, the Mir Wali had also began preparing for an offensive with the backing of a Bukharan army. Akram Khan, realizing the grave situation and war that was coming, spent the remaining weeks of the cold winter repairing forts along the Amu Darya and pleading Dost Mohammad to send further reinforcements. Also informing his father that he would rather "die" then have any of his brothers supersede him in the affairs of lesser Turkestan.[134] When spring came, Akram Khan was in no position to complain about who commanded any Afghan reinforcements, as a Bukharan army, rumored to be over one hundred thousand strong, was reported to have arrived at the Qarqi preparatory to crossing the Amu Darya river.[135]
Ishan Uraq, who had taken refuge with his brother in Aqcha, had strengthened the defenses of Minglik, a strategic fortress between Balkh and Aqcha, which marked the effective frontier between Afghanistan and Bukhara.[135] In March 1850, Rustam Khan, the Hakim of Sheberghan, imprisoned two Afghan ambassadors, believing that the Afghans were in no position to seek retribution upon this insult.[135] Dost Mohammad, annoyed by the Hakim's action, ordered Haidar Khan to march to Balkh with reinforcements to prevent Akram Khan from being overwhelmed by the growing coalition.[135] However, rivalry between Dost Mohammad Khan's sons, and reluctance by the Afghans to march north delayed their advance for weeks.[135] Haidar Khan made matters worse by demanding a precondition that he should be given overall command of the Afghan army in Balkh, something that Dost Mohammad Khan did not concede as a demand.[135] In July 1850, Dost Mohammad successfully convinced another one of his sons, Mohammad Amir Khan, to march to Akram Khan's relief.[135] A few weeks later, a further force of three thousand Sowars, and two thousand footmen under Prince Amin Khan also grudgingly left for Balkh.[135]
Conquest of Minglik and Aqcha (1850-1851)
Akram Khan, low on supplies and needing food, money, and men, tried to delay hostility with Nasrullah Khan of Bukhara by opening negotiations.[135] Akram Khan attempted to remind the ruler that their predecessors had fixed the river as the official boundary between Bukhara and Afghanistan, and that the death of any Muslim would end at his door.[135] As luck would have it, Nasrullah Khan was more interested in dealing with the rebellious province of Shahr-i Sabz, rather then the Afghan presence in Balkh. This reminder of Timur Shah's treaty with Bukhara also provided a convenient excuse to not aid Ishan Uraq, thus not risking a long and protracted war with the Afghans.[136] Despite the personal plea to Nasrullah Khan, no Bukharan troops would come to the aid of Ishan Uraq, leaving the Amirs of the Chahar Wilayat to defend themselves with the resources they had the best they could.[136] Akram Khan attempted to reach a compromise with Ishan Uraq, promising that the states of the Chahar Wilayat would have autonomy under Afghan rule for recognition of Afghan hegemony, as well as a tribute of 900,000 rupees.[136] These terms, however, were rejected by Ishan Uraq, having already been betrayed on the former treaty that the Afghans attempted to make when they first blocked Akram Khan from marching north.[136]
Following the breakdown of negotiations, Ishan Uraq led an offensive upon numerous Afghan outposts between Minglik and Balkh, harrying Akram Khan's forces, and killing many in the process.[136] At the end of September 1850, Hukumat Khan, the ruler of Maimana, no longer facing any threat from Yar Mohammad and his forces from Herat, marched to the aid of Ishan Uraq with several thousand men and twelve guns.[136] Haidar Khan and his reinforcements were delayed by a rebellion in Khulm and Aibak, and Akram Khan was defeated in battle once by Ishan Uraq in the open field.[136] However, once Haidar Khan's reinforcements reached Balkh, Akram Khan marched against Minglik. After suffering heavy losses, his forces successfully captured the fortress. After this victory, Akram Khan's forces advanced to the outskirts of Aqcha, the headquarters of Ishan Uraq.[136]
Haidar Khan's march to reinforce Balkh was delayed by a rebellion caused by the return of Mir Wali and his son, Mir Ganj'Ali beg. Aided by local Amirs from Qunduz and Badakhshan, Mir Wali managed to seize control of Aibak and Ghaznigak and closed the road between Kabul and Balkh.[136] However, Haidar Khan and Amin Khan, who were already marching from Bamiyan to reinforce Balkh, retook Aibak and quelled the rebellion. Mir Wali was forced to flee across the Amu Darya once again in the protection of Bukharan lands.[137] From his exile in Bukhara, he attempted to request British aid, utilizing contacts such as Major Abbott, who he still was in touch with. Mir Wali informed Abbott of his troubles and asked for the British to put pressure on the Afghans to withdraw from Balkh.[137] Apart from an expression of sympathy toward Mir Wali, the British had no concerns in interfering with Dost Mohammad's conquest, believing it to be an internal matter in Afghanistan, thus allowing Dost Mohammad to continue his campaigns in Balkh unchallenged.[137][138]
By the winter of 1850, the Afghans were beleaguered in terms of their supplies in Balkh. Despite the subjugation of Minglik and Balkh, the number of reinforcements sent to Balkh put heavy strain on the local supply. The shortage of provisions led to arguments among the Princes over who had the right to the supplies and cash gained by Akram Khan following the conquest of Balkh.[137] The matter was only settled after Dost Mohammad Khan ordered Akram Khan and Haidar Khan to divide the spoils of the campaign equally, and gave the revenues of Balkh and Minglik to Akram Khan, while Haidar Khan obtained the revenues of Khulm and Mazar-I-Sharif.[137]
The consequences of this squabble over the spoils of war delayed the Afghan advance to finally lay siege to Aqcha. It was only until November 1850 that the Afghans then marched on Aqcha and laid siege to it. It took until Mid-January of 1851 to prepare to storm the city. The Afghans launched their final wave of attack and lost over 500 men with the defenders of Aqcha defending fiercely, the Afghans successfully entered the city and as a result of the garrison of Aqcha refusing to surrender, Akram Khan let his men plunder and loot the city for three days to compensate for the losses and deprivations they had faced during the campaign.[139][124] Ishan Uraq and Ishan Sudur along with Beglarbegi Mahmud Khan of Sar-I-Pul were captured, but their lives were spared.[140][139] However, a son of Mir Wali, (likely Ganj'Ali beg) and several other leading families of Turkistan were forced to exile in Kabul.[139] After some debate and disagreement among Haidar Khan and Akram Khan, Mahmud Khan of Sar-I-Pul was imprisoned in Balkh and not exiled. Akbar Khan sought to use Mahmud Khan's proven prowess and experience to the advantage of the Afghans.[139] Rustam Khan of Sheberghan was also reported to have died in the siege of Aqcha, succeeded by his son-in-law, Hakim Khan, while Mahmud Khan's younger half-brother, Qilij Khan, took control of Sar-I-Pul. Both rulers swore submission and gave homage to Akram Khan, thus bringing Sheberghan and Sar-I-Pul under Dost Mohammad Khan's realm.[139]
With the fall of Aqcha, and the arrest and execution of many important Amirs who ruled in Balkh, had broke Uzbek resistance to Afghan rule for the time being.[139] As following this success, Haidar Khan, alongside some regiments who had been campaigning in the north for up to two years at that point, returned to Kabul, bringing with them many of the defeated Amirs of Balkh.[139] The casualties of the conquest of Balkh were high, with the Afghans having lost around fifteen hundred men from being killed in action, or died as a result of exposure to the extreme frost, or disease. Many others had also deserted from the army.[139]
The return of Haidar Khan to Kabul, the exile of Ishan Uraq and other Amirs, the harsh revenue taxes Akram Khan imposed on the province, as well as exaggerated reports of an illness Dost Mohammad Khan befell in 1851, led to circulating rumors that Dost Mohammad Khan had died.[141] This led to unrest in Qataghan, further intrigued by Mir Wali and the Mir Ataliq of Kunduz.[142] This led to the defeat of Afghans in a battle, prompting Dost Mohammad Khan to issue orders to prepare reinforcements to be sent to Balkh and reinforce the garrisons there.[142] Once again, Barakzai Sardars had stunted this plan and refused to give support to reinforce the garrisons in Balkh, specifically Nawab Jabbar Khan, predicting that no good would come out of sending troops to reinforce Balkh.[142] Despite the Initial setback, the rebellion in Qataghan was quelled.[142]
Uprising in Turkistan and Conquest of Sheberghan (1852-1854)
The winter campaign against Qataghan, however, came with a great price. Akram Khan, who was already suffering from Tuberculosis, caught Pneumonia during the course of the campaign.[142] This then developed to Pleurisy, from which he would never recover from. He died in 1852.[124][142] Following his unexpected death, his twelve-year old son took control as temporary governor of Balkh.[142] Dost Mohammad Khan then appointed Mohammad Afzal Khan, his eldest son as the successor of Akram Khan in the northern provinces.[142] This appointment was not well received with Dost Mohammad's other sons, who continued to intrigue and plot against each other much to the annoyance of Dost Mohammad.[142]
Afzal Khan's first months as governor passed without any disturbances, though a number of chiefs from Balkh continued seeking for outside help against the Afghans.[143] A number of Aimaq Amirs made a secret journey to Tehran, soliciting the help of Persia.[143] In the east, Qataghan continued to be disturbed and the Mir Ataliq opened contact with the Bukharan rebellious province of Shahr-I Sabz, with the aim of seizing Afghan-held areas near the Amu Darya.[143] During this, another one of Dost Mohammad's sons, Muhammad Zaman Khan, alongside the governor of Khulm, plundered some Kochi nomads.
The first major challenge to Afzal Khan's paramountcy however, was from Mahmud Khan, the former Beglarbegi of Sar-I-Pul. In the summer of 1852, following disturbances in Mazar-I-Sharif, in which the sons of Shuja'al-Din seemed to have played a part in, Afzal Khan marched his forces into the holy city and forced the dead Shaikh's sons to accept Afghan overlordship, possibly even garrisoning the city-state.[143] However the Afghan presence of troops was the catalyst for a further conflict, growing resentment against Afghan rule in Turkistan.[143]
Mahmud Khan, released sometime in 1851, and given over the governorship of Aqcha, hearing of Afzal Khan's actions at Mazar-I-Sharif, immediately began a rebellion.[143][140] Afzal Khan acted quickly, sending over five hundred sowars against Aqcha, where Afzal Khan was joined by Hakim Khan of Sheberghan, and Ghazanfar Khan of Andkhui, who had long standing rivalry with Mahmud Khan.[143] After a number of fierce encounters, Afzal Khan retook Aqcha and executed the leaders of the uprising. Mahmud Khan, however, escaped and continued to oppose Dost Mohammad Khan's authority. According to one report, the whole of Afghan Turkistan was "in a state of rebellion".[143]
In an attempt to quell the mass uprising, Dost Mohammad Khan instructed Afzal Khan to placate the leaders of the rebellion with soft and kind words until the Tokhi rebellion had been put down in southern Afghanistan.[144] Dost Mohammad released Ishan Uraq and Sudur and in a private audience, pushed them toward aiding in the re-capture of Mahmud Khan. In exchange for Ishan Sudur to be installed as re-installed as governor of Aqcha under Afghan paramountcy.[144] Whilst Ishan Uraq was in Ghazni, Sudur left for Turkistan. After much fierce fighting, Akram Khan, possibly aided by Ishan Sudur, successfully re-took Aqcha from Mahmud Khan once again and he was confined in the fortress of Sherabad, before being put to death.[144][145]
The seriousness of Mahmud Khan's rebellion was demonstrated by the fact that Dost Mohammad Khan thought of going to Balkh personally to supervise the operations against the uprising.[144] Though he did not leave Kabul, he accepted a request by Afzal Khan that he send Sardar Wali Muhammad Khan and Mohammad Zaman Khan to Turkestan, with them being put in control of Aqcha and Minglik.[144]
The quelling of Mahmud Khan's rebellion also led to serious reprisals in Turkestan, beginning with a large fine on the city of Aqcha itself. This was further followed by the cities defenses being completely levelled to prevent further rebellion.[144] Mir Qilij Khan, Mahmud Khan's half brother, and ruler of Sar-I-Pul, was implicated in the rebellion and forced to accept Afghan overlordship.[144] Threatening messages were also sent to Hukumat Khan in Maimana, who in turn sent his son, Dilawar Khan to Afzal Khan and presented gifts to ease relations as a peace offering. This however, was rejected and was informed that unless the Wali himself came in person to tender his submission, he would be attacked.[146] No response came out of this and Hukumat Khan began searching for allies against the Afghans. Even sending an envoy to the Qajar governor of Khorasan to enlist Persian help, though to no proper response.[147] As for Ishan Sudur, he was not reinstated as ruler of Aqcha, and instead the position was given to Sardar Wali Muhammad Khan.[147] In a later intelligence report in 1856, the Ishan's name is mentioned in Kabul under house arrest.[147] Hakim Khan of Sheberghan, however, was rewarded for his support of Dost Mohammad and was given the title of Nizam-al-Mulk and a robe of honor which conferred official recognition that he ruled Sheberghan under Afghan overlordship.[147][145] Ghazanfar Khan of Andkhui as well, received similar letters from Dost Mohammad Khan and the conferred title of 'Amin al-Daula, and an inscribed signet ring which commemorated his appointment.[147][145]
In late September 1853, a mutiny sprung up among Afghan troops who were stationed in the north. Many of the soldiers had been campaigning for three years at that point and declared that they wished to return home.[147] A contingent of these mutineers went to the shrine of 'Ali in Mazar-I-Sharif, hoping this would be used as a form of shelter. Afzal Khan wrote numerous letters to Dost Mohammad Khan, pleading his father to send reinforcements, otherwise Turkistan would be left undefended from outside threats such as the Mir Wali or Bukhara.[147] The mutiny came at a difficult time for Dost Mohammad, as most his forces were concentrated at the time around Ghazni due to an ongoing conflict with the Kandahar Sardars. Dost Mohammad instructed his son to lie his way out of trouble by telling the mutineers that a relief force was being sent to Balkh to take their positions so they could return home. Dost Mohammad also instructed Afzal Khan to patrol the routes south on the route to Kabul so that any fleeing mutineers would be intercepted.[147] Dost Mohammad also showed favor to one of the sons of Murad Beg of Qunduz, who was at blows with his older brother, the Mir Ataliq.[147] This individual likely attempted to overthrow his brother, and fled to the service of Dost Mohammad Khan after escaping from Turkistan.[147] Despite opposition from the Amirs of Sheberghan and Qunduz, Dost Mohammad seeked to win over the dissident Ing and unruly states with promises to overthrow their rivals in return for them submitting to Afghan overlordship.[148]
The reluctance of senior Barakzai Sardars and refusal to send reinforcements delayed any form of relieving Balkh, and it was not until late spring of 1854 that the regiments in Balkh were finally relieved by forces sent under Wali Muhammad Khan.[148] By the time he reached Balkh, revolt was instigated throughout the region. In spring, the Mir Wali had gone to Bukhara and pleaded with Nasrullah Khan to aid his kinsmen across the Amu Darya. This plea was responded by Mir Wali being given control of a sizeable Bukharan army. However, Nasrullah Khan instructed his forces to not cross the Amu Darya due to rumors of a Persian army was advancing through Khwarazm, and even a Russian force to be advancing on Urganj.[148] This, as a result, compelled Nasrullah Khan to not pursue a campaign in the Chahar Wilayat due to fears of an external invasion. Even when the threat of invasion subsided, Nasrullah decided that a section of the assigned force under Mir Wali have a section of his force to assist in the annual attack on Shahr-I Sabz.[148] For around two months, Mir Wali was stuck beyond the Amu Darya unable to advance in the Chahar Wilayats as a result of his situation. As a result, he bided his time by trying to gain support from local Amirs and rulers across the Amu Darya, by the time Nasrullah Khan allowed him to advance beyond the river, the element of surprise in his attack was gone.[148]
During this period of time in which the Mir Wali was unable to take any action, the Mir Wali again persuaded the British to withdraw from Balkh.[149] Mir Wali addressed a letter to Major Edwardes at Peshawar, and affirmed his complaints against Dost Mohammad Khan. Mir Wali also claimed that the Mir Ataliq of Qunduz alongside the Mir of Badakhshan had pledged allegiance against Dost Mohammad Khan and sworn an alliance with the Mir Wali to drive the Afghans from Turkestan.[149]
The Mir Wali, however, having been cut off from affairs south of the Amu Darya river, was unaware of the grown relations between the Afghans and the British. The Afghans and the British had reconciled following the First Anglo-Afghan War and the British were in active support of Dost Mohammad's campaigns in Turkestan. Edwardes also presented a pro-Afghan view in the conquest of Turkestan, believing that "the more the Afghans take the less there will be for either Russia or Persia".[149] As a result, Mir Wali's plea once again failed to accumulate any support from the British.[149]
As Mir Wali was now able to cross the Amu Darya with the head of a Bukharan army, at the head of some twenty thousand men he crossed the Amu Darya, splitting his army in two contingents. One army contingent numbered around 8,000 men and marched on Sheberghan, while the remaining army marched to Aqcha.[149] Alongside this, the arrival of a Bukharan army kicked off a large rebellion throughout the region, especially in the Chahar Wilayat.[149] Afzal Khan did not withdraw from Balkh, but was taken off guard by the size of the army. Mir Wali marched unopposed to Sheberghan, where Hakim Khan threw open the gates of the city to him. Following this, regiments from Maimana and surrounding provinces were gathering in Sheberghan.[150] The defenses of Sheberghan were also significantly improved upon the capture by Mir Wali, with new wet ditches dug around the citadel and defenses were strengthened in preparation for the coming battle.[150] The second contingent laid siege to Wali Muhammad in Aqcha, cutting off all supplies to the Afghan garrisons to the east, and forced Muhammad Zaman Khan to abandon the fortress of Minglik and withdrew to Balkh.[150] Despite the situation, the Mir Ataliq of Qunduz remained loyal to the Afghans, and the Mir's son was sent in haste to Kabul to notify Dost Mohammad that if reinforcements were not sent to Balkh, it could be put to siege within ten or fifteen days, and that the whole of Turkestan would be lost.[150] Within hearing this news, Dost Mohammad dispatched thousands of fresh troops to support Balkh, alongside four hundred camel loads of wheat, and fifty camel loads of ammunition and other supplies.[150]
Despite the Bukharan army's overwhelming numbers, the siege of Aqcha's results were relatively slow, bringing little success. This led to a growing quarrel between Mir Wali and the Bukharan commander at Sheberghan, later resulting in Nasrullah's general withdrawing most the Bukharan army back across the Amu Darya and leaving only a token garrison of 1,000 men to defend the Bukharan ambassador who accompanied the army.[150] A few weeks later, the Bukharan Ambassador also fled, leaving Mir Wali and Hakim Khan.[150] When Dost Mohammad heard the news of Bukharan withdrawal, he ordered his forces to pursue an offensive, and commanded Afzal Khan with strict instructions to capture Mir Wali.[150]
In November 1854, Afzal Khan marched against the remaining Bukharan army at Aqcha, facing little resistance, Afzal Khan relieved Sardar Wali Muhammad of the siege of Aqcha.[151] From Aqcha, the combined Afghan army marched on Sheberghan. Leaving his artillery train between Aq Robat and Yangi 'Aruq, Afzal Khan dispatched a scouting force to discover if Hakim Khan's cavalry was defending a forward position. However upon the advance of this scout force, the Sheberghan armies completely abandoned the position, leading to the Afghans to occupy it.[151] The following morning, Afzal Khan arrived in at Yangi 'Aruq and rode out to view the defenses of Sheberghan. Afzal Khan ordered his troops to prepare to march against the city as soon as they reached its defenses.[151] At dawn on 27 November 1854, The Afghan forces assembled before the city and split into four contingents. Sardar Muhammad Amin with half his regiment and Sowars supported by Sardar Wali Muhammad Khan, was to attack from the south. The other half of Muhammad Amin's contingent, under the command of its commander, was to attack the eastern sector. Muhammad Zaman Khan, with more Barakzai Sowars, was tasked with attacking the northern defenses of the city. While Afzal Khan and his brother Shuja al-Daula Khan would attack the west of the city.[151]
Once Afzal Khan felt his forces were prepared, he ordered the simultaneous attack from all sides, with the Afghans and the defenders of the city fighting day and night. However, the Afghan artillery managed to breach the walls of Sheberghan. Hakim Khan, realizing the dire situation, requested a meeting with Afzal Khan in an attempt to plead for the city to be spared and the city to also not to be put to the sword.[151] Afzal Khan rode within 100 yards of the fort, accompanied by other Sardars, as did Hakim Khan march out with Quran in hand to meet him.[151] The terms of surrender demanded that Hakim Khan hand over his most powerful Artillery, and pay a tribute of five hundred thousand tilas. Alongside this, Dost Mohammad Khan's name would be read in the Khutbah instead of Nasrullah Khan's recognizing Dost Mohammad as the paramount of Sheberghan.[152] Hakim Khan was allowed to continue governing Sheberghan. Sher Muhammad Khan Ming, who had been in command of the Maimana contingent of troops sent paid his respects to Afzal Khan and offered his services to Dost Mohammad Khan. Ghazanfar of Andkhui, who had also participated in the rebellion, tendered his submission to Dost Mohammad.[152]
The Mir Wali however, was handed over to Afzal Khan, and wrote a letter of submission to Dost Mohammad. "The Deserter has come to the door, He has, through his sins, lost his character, There is no occasion to say more. I do not say accept my prayers, but draw the pen of forgiveness over my crimes".[152]
The Mir Wali was assigned a small Jagir on one of the Hazhda Nahr where he and his family lived under strict surveillance. Mir Wali died in the spring of the following year, with his sons affirming that he was poisoned, possibly by Afzal Khan who wished this the powerful Uzbek claimant and former leader out of the way.[152]
The fall of Sheberghan was a victory of great importance to Dost Mohammad, succeeding in defeating the first Bukharan attempts to challenge his conquest of Balkh and the capture of Mir Wali and his death led to the removal of another threat to the security of Dost Mohammad's rule in Turkestan.[152] Sheberghan became a vassal of Dost Mohammad and his suzerainty over the Chahar Wilayat had been affirmed.[152]
Anglo-Afghan treaty (1855)
Dalhousie, the governor general of India, wrote to Dost Mohammad requesting that they further their relations and put formal footing toward issues and claims. Dost Mohammad accepted and both parties met in February of 1855.[138] Both parties met in Peshawar, with Dost Mohammad sending his son, Haidar Khan to Peshawar to meet with the British.[153] Haidar Khan attempted to negotiate about Afghan claims toward Peshawar. However, Edwardes told him that British sovereignty over the region was non negotiable, leading to the topic being dropped. The British recognition of Dost Mohammad's claim to Herat also failed.[11] However, when it came to the Chahar Wilayats and specifically Balkh, the British agreed with Afghan policy of expansion in the region. Neither wanted to see Bukharan sovereignty over the region restored, Edwardes also downplayed discontent of Afghan rule in Balkh amongst the indigenous population and the oppression of Afzal Khan's administration.[11]
Dost Mohammad Khan also exploited fears of a Bukharan-Russian alliance against Afghanistan, exaggerating the threat that Nasrullah Khan posed to the Chahar Wilayat. Haidar Khan also pushed his fathers claims from Badakshan, to Maimana, and Herat.[154]
A treaty was signed on 30 March 1855, recognizing Dost Mohammad Khan as king of Afghanistan, and with the treaty formally referring to him as "His Highness".[11] Despite the loss of claim to Peshawar, Dost Mohammad Khan could further press his claim to the Chahar Wilayat without opposition from the British. Dost Mohammad Khan also exploited the propaganda value of this treaty by claiming that in the occurrence of a Bukharan invasion, the British would directly intervene and aid the Afghans in a war.[11]
Rebellion of Hakim Khan (1855-1856)
Conquest of Herat and Death (1862-1863)
Legacy
Gallery
 Portrait of Dost Mohammad Khan, 1850.
 Portrait of Dost Mohammad Khan, 1840.
 Sketch of Dost Mohammad Khan in 1840.
 Dost Mohammad Khan with one of his sons.
 Dost Mohammad Khan with 3 of his sons, Muhammad Akram Khan, Haidar Khan and Abdul Ghani Khan. Dost Mohammad is seated on the carpet, also wearing green clothes.
_Mohammad_Wellcome_L0025008.jpg.webp) Dost Mohammad Khan as Emir of Afghanistan.
Dost Mohammad Khan as Emir of Afghanistan. Dōst Moḥammad Khan seated slightly to the right of center in this photograph, with the long white beard. To Dōst Moḥammad's right, the first figure in a white chapan (overcoat) is his son and successor Sher ʻAlī Khān (1825–1879), who ruled Afghanistan from 1863 to 1879. Abd al-Raḥmān Khān (c. 1844 – 1901), the grandson of Dōst Mohammad and future “Iron Amir” of Afghanistan, is on Dōst Moḥammad's far left.
 Maharaja Sher Singh receives Emir Dost Mohammad Khan in 1850. Dost Mohammad can be seen seated on the far left.
 Dost Mohammad Khan with his son, Akbar Khan.
 Portrait of Dost Mohammad Khan.
 Sketch of Dost Mohammad Khan
 Drawing of Dost Mohammad Khan of Afghanistan while in Exile in British India
 Portrait of Dost Mohammad Khan, holding a bow and arrow.
 Portrait of Dost Mohammad Khan, 1840.
See also
References
- Dalrymple, W. (2013). The Return of a King: The Battle for Afghanistan. Borzoi book. Bloomsbury. p. 478. ISBN 978-1-4088-1830-5. Retrieved 15 June 2020.
- Tarzi, Amin H. "DŌSTMOḤAMMAD KHAN". Encyclopædia Iranica (Online ed.). United States: Columbia University.
- McChesney, Robert; Khorrami, Mohammad Mehdi (19 December 2012). The History of Afghanistan (6 vol. set): Fayż Muḥammad Kātib Hazārah's Sirāj al-tawārīkh. BRILL. ISBN 978-90-04-23498-7.
- Yusuf, Mohamed (1988). A History of Afghanistan, from 1793 A.D. to 1865 A.D. New York University. ISBN 1466222417.
- Kakar, M. Hasan (2006). A Political and Diplomatic History of Afghanistan, 1863-1901. Brill. p. 10. ISBN 978-90-04-15185-7.
- Lee 1996, p. 219.
- Lee 2019, p. 302.
- Encyclopædia Britannica – Dost Mohammad Khan, "ruler of Afghanistan (1823–63) and founder of the Barakzay dynasty, who maintained Afghan independence during a time when the nation was a focus of political struggles between Great Britain and Russia..."
- "Anglo-afghan wars", Encyclopaedia Iranica
- Lee 2019, p. 303.
- Lee 2019, p. 317.
- "DŌST MOḤAMMAD KHAN". Encyclopaedia Iranica. 1995. Retrieved 8 February 2023.
{{cite web}}: CS1 maint: url-status (link) - Adamec, Ludwig W. (2010). The A to Z of Afghan Wars, Revolutions and Insurgencies. Scarecrow Press. p. 105. ISBN 978-0-8108-7624-8. Retrieved 3 April 2013.
- Life of the Amîr Dost Mohammed Khan, of Kabul: with his political ..., by Mohan Lal, Volume 1. pp. 1–3.
- "DŌST MOḤAMMAD KHAN – Encyclopaedia Iranica". iranicaonline.org. Archived from the original on 29 April 2011. Retrieved 22 February 2021.
Dōst Moḥammad Khan was raised by his Qezelbāš mother, from the Persian tribe of Sīāh Manṣūr and reportedly Pāyenda Khan's favorite wife, though not of noble stock.
- Tarzi, Amin H. "DŌSTMOḤAMMAD KHAN". Encyclopædia Iranica (Online ed.). United States: Columbia University.
- The Rise of Afghanistan, p. 124 // Afghanistan: A Military History from Alexander the Great to the War Against the Taliban. Author: Stephen Tanner. First published in 2002 by Da Capo Press; (revised edition) reprinted in 2009. Philadelphia: Da Capo Press, 2009, 375 pages. ISBN 9780306818264
- 5. The Rise of Afghanistan, page 126 // Afghanistan: A Military History from Alexander the Great to the War Against the Taliban. Author: Stephen Tanner. First published in 2002 by Da Capo Press; (revised edition) reprinted in 2009. Philadelphia: Da Capo Press, 2009, 375 pages. ISBN 9780306818264
- Noelle, Christine (2012). State and Tribe in Nineteenth-Century Afghanistan: The Reign of Amir Dost Muhammad Khan (1826–1863). Taylor & Francis. p. 19. ISBN 9781136603174.
- Noelle 1997, p. 17.
- Lee 2019, p. 188.
- Gupta, p. Topic 3 pp. 1391.
- Bizhan, Nematullah (14 August 2017). Aid Paradoxes in Afghanistan: Building and Undermining the State. Routledge. ISBN 978-1-351-69265-6.
- Noelle 1997, p. 15.
- Noelle 1997, p. 16.
- Noelle 1997, p. 22.
- Noelle 1997, p. 23.
- Noelle 1997, p. 36.
- Noelle 1997, p. 37.
- Lee 2019, p. 205.
- Jaques, Tony. (2006). Dictionary of Battles and Sieges. Greenwood Publishing Group. p. 508. ISBN 9780313335365. Retrieved 31 July 2010.
- Noelle 1997, p. 38.
- Noelle 1997, p. 39.
- Lee 2019, p. 227.
- Lee 2019, p. 228.
- Lee 2019, p. 229.
- Lee 2019, p. 230.
- Lee 2019, p. 231.
- Lee 2019, p. 233.
- Lee 2019, p. 234.
- Lee 2019, p. 235.
- Lee 2019, p. 236.
- Lee 2019, p. 237.
- Lee 2019, p. 238.
- Lee 2019, p. 239.
- Lee 2019, p. 240.
- Lee 2019, p. 242.
- Lee 2019, p. 246.
- Lee 2019, p. 247.
- Lee 2019, p. 248.
- Lee 2019, p. 249.
- Lee 2019, p. 250.
- Lee 2019, p. 251.
- Lee 2019, p. 252.
- Lee 2019, p. 253.
- Lee 2019, p. 254.
- Lee 2019, p. 255.
- Lee 2019, p. 256.
- Lee 2019, p. 257.
- Lee 2019, p. 258.
- Lee 2019, p. 259.
- Lee 2019, p. 260.
- Lee 2019, p. 264.
- Lee 2019, p. 265.
- Lee 2019, p. 266.
- Lee 2019, p. 267.
- Lee 2019, p. 268.
- Lee 2019, p. 269.
- Lee 2019, p. 270.
- Lee 2019, p. 271.
- Lee 2019, p. 272.
- Lee 2019, p. 273.
- Noelle 1997, p. 51.
- Lee 2019, p. 274.
- Lee 2019, p. 275.
- Lee 2019, p. 276.
- Lee 2019, p. 277.
- Lee 2019, p. 278.
- Lee 2019, p. 279.
- Lee 2019, p. 280.
- Lee 2019, p. 282.
- Lee 2019, p. 283.
- Lee 2019, p. 284.
- Lee 2019, p. 285.
- Lee 2019, p. 286.
- Lee 2019, p. 287.
- Lee 2019, p. 288.
- Lee 2019, p. 289.
- Lee 2019, p. 290.
- Willasey, Tim (2014). ""One of the basest, foulest murders that ever stained the page of history"? The brutal death of Sir William Macnaghten". VictorianWeb. Retrieved 5 February 2023.
{{cite web}}: CS1 maint: url-status (link) - Lee 2019, p. 290-291.
- Lee 2019, p. 291.
- Lee 2019, p. 291-292.
- Lee 2019, p. 292.
- Lee 2019, p. 293.
- Chisholm, Hugh, ed. (1911). . Encyclopædia Britannica. Vol. 11 (11th ed.). Cambridge University Press. p. 450: see the second line:- "....was the scene of the massacre....".
- Lee 2019, p. 293-294.
- Lee 2019, p. 294.
- Lee 2019, p. 294-295.
- Lee 2019, p. 295.
- Lee 2019, p. 296.
- Lee 2019, p. 296-297.
- Lee 2019, p. 297.
- Lee 2019, p. 298.
- Lee 2019, p. 299.
- Lee 2019, p. 300.
- Lee 2019, p. 301.
- Lee 2019, p. 301-2.
- Lee 2019, p. 320.
- Noelle 1997, p. 53.
- Noelle 1997, p. 56.
- Lee 2019, p. 308.
- Lee 2019, p. 309.
- Lee 2019, p. 310.
- Noelle 1997, p. 57.
- Lee 2019, p. 312.
- Lee 2019, p. 312-313.
- Lee 2019, p. 313.
- Lee 2019, p. 313-314.
- Lee 2019, p. 314.
- Lee 2019, p. 310-311.
- Lee 2019, p. 311.
- Lee 2019, p. 311-312.
- Lee 2019, p. 315.
- Lee, Jonathan (1996). The "ancient Supremacy": Bukhara, Afghanistan, and the Battle for Balkh, 1731-1901 (Illustrated ed.). E.J Brill. ISBN 9789004103993.
- Lee 1996, p. 220.
- Lee 1996, p. 220-221.
- Lee 1996, p. 221.
- Lee 1996, p. 221-222.
- Lee 1996, p. 222.
- Lee 1996, p. 222-223.
- Lee 1996, p. 223.
- Noelle 1997, p. 87.
- Lee 1996, p. 225.
- Lee 1996, p. 226.
- Lee 1996, p. 227.
- Lee 1996, p. 228.
- Lee 2019, p. 316.
- Lee 1996, p. 229.
- Noelle 1997, p. 91.
- Lee 1996, p. 229-230.
- Lee 1996, p. 230.
- Lee 1996, p. 231.
- Lee 1996, p. 232.
- Noelle 1997, p. 92.
- Lee 1996, p. 232-233.
- Lee 1996, p. 233.
- Lee 1996, p. 234.
- Lee 1996, p. 235.
- Lee 1996, p. 236.
- Lee 1996, p. 237.
- Lee 1996, p. 238.
- Lee 2019, p. 316-317.
- Lee 1996, p. 241.
Sources
- Dalrymple, William (2013). Return of a King: The Battle for Afghanistan. Bloomsbury. ISBN 978-1-408-82287-6.
- Lee, Jonathan L. (15 January 2019). Afghanistan: A History from 1260 to the Present. Reaktion Books. ISBN 978-1-78914-010-1.
- Noelle, Christine (1997). State and Tribe in Nineteenth-century Afghanistan: The Reign of Amir Dost Muhammad Khan (1826–1863) (illustrated ed.). Routledge. ISBN 0-7007-0629-1.
- Gupta, Hari Ram (1939). "Mohan Lal's Observations on the Causes of the Insurrection in Kabul". Proceedings of the Indian History Congress. 3: 1388–1401. JSTOR 44252485.
- Vogelsang, Willem (2002) The Afghans, pp. 248–56. Blackwell Publishers. Oxford. ISBN 0-631-19841-5.
- Lal, Mohan (1846). Life of the Amir Dost Mohammed Khan of Kabul. ISBN 9781139199094. OCLC 967378175.
- Shahamat Ali (1970) The Sikhs and Afghans. Patiala,
- Harlan, Josiah (1842) A Memoir of India and Afghanistan, London.
- Burnes, Alexander (1843) Cabool, London.
- Ganda Singh (1959) Ahmad Shah Durrani, Bombay.
- Sun, Sohan Lal (1885–89) `Umdat-ut-Twarikh Lahore, (Online copy)
- Braithwaite, Rodric (2012) Afgantsy, London.
External links

 Hotak Empire Hotak Empire | |
|---|---|
 Durrani Empire Durrani Empire | |
.svg.png.webp) Barakzai Emirate Barakzai Emirate | |
.svg.png.webp) Barakzai Kingdom Barakzai Kingdom | |
.svg.png.webp) Saqqawist Emirate (unrecognized) Saqqawist Emirate (unrecognized) | |
| Barakzai Kingdom (restored) | |
Italics indicates a localized rebel monarch | |
| Leaders |
| ||||||
|---|---|---|---|---|---|---|---|
| Events |
| ||||||
| Related | |||||||
| |||||||
